Fundamentals of Webhooks
Webhooks offer a method to inform your application about specific events, like the placement of a new order. They facilitate advanced e-commerce integration between your shopping cart and other systems.
Upon an event, Snipcart will initiate a POST request to a URL specified by you in the dashboard.
Your designated endpoint must respond with data in Content-Type application/json format and a status code 200.
For those new to webhooks, it's recommended to read this introductory article.
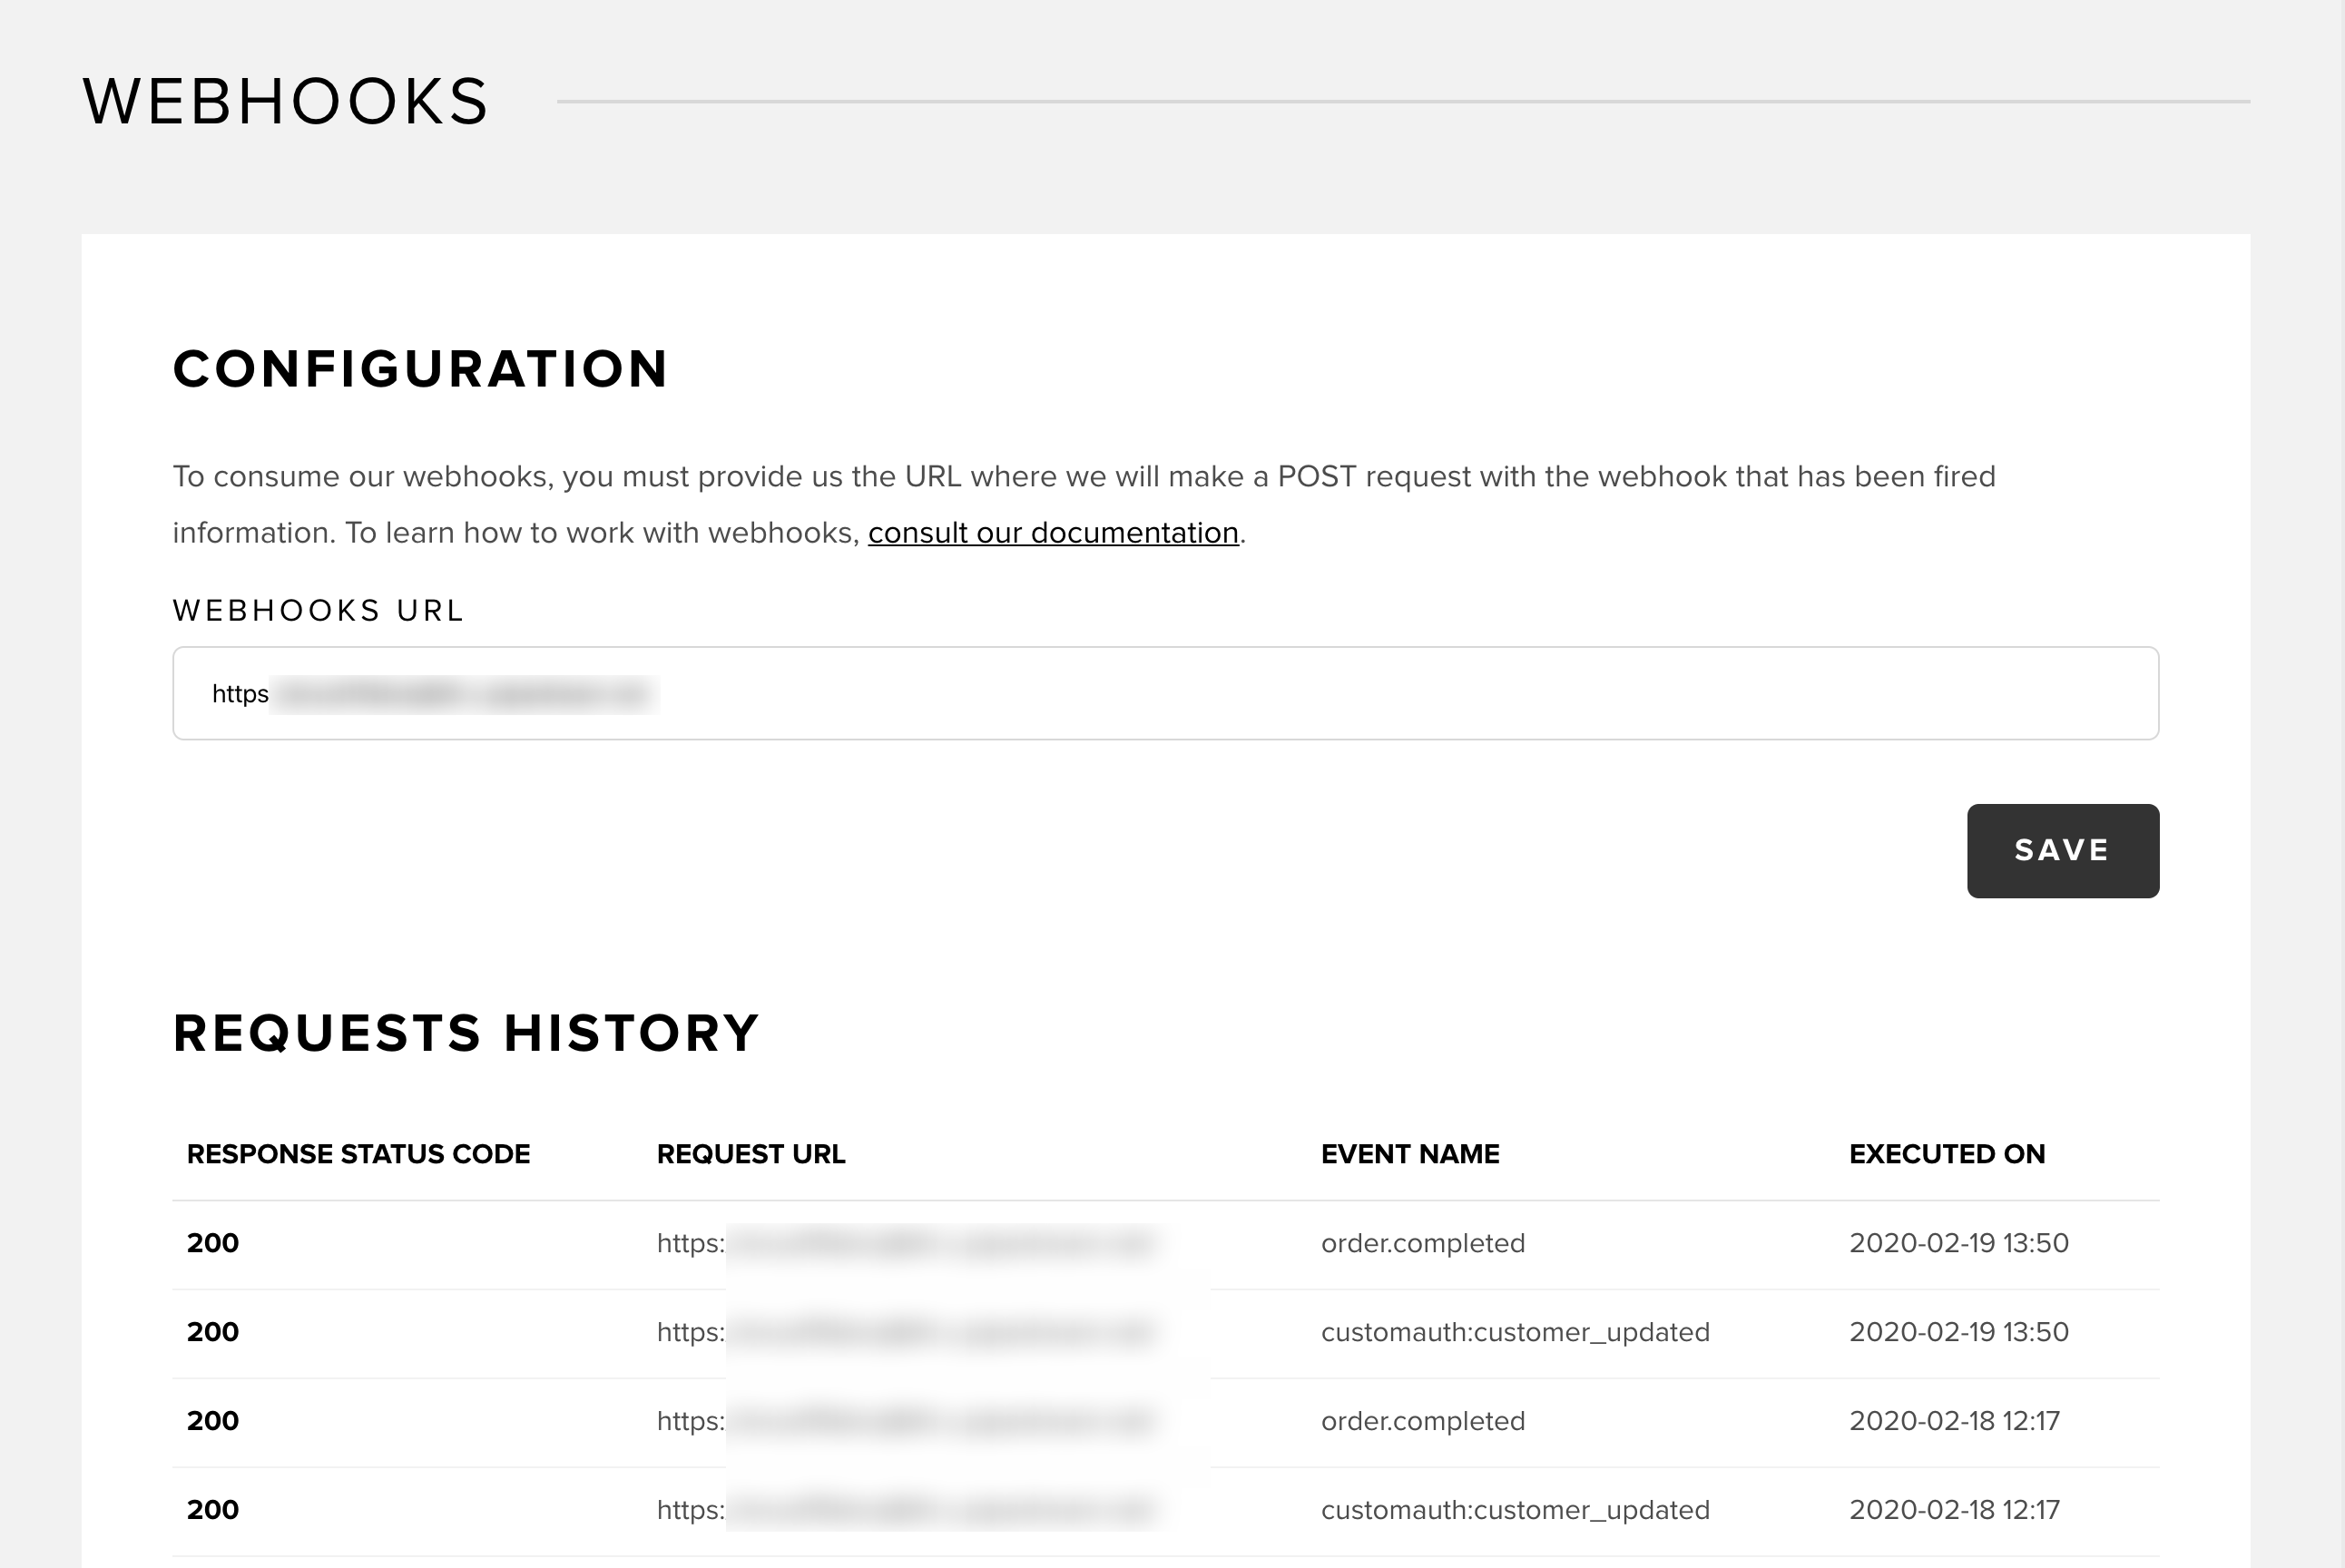
Setting Up a Webhook URL
To configure your webhook URL, log into the Snipcart dashboard and navigate to Store Configurations → Webhooks.
The URL must be an absolute URL.
Further down, we provide examples of handling Webhook requests.
Note: You can enter multiple webhook URLs, separated by semicolons, like: https://example.com/webhooks; https://example2.com/webhooks/
Details of the Request
Clicking on a webhook URL entry in the dashboard opens its detailed page.
This page is useful for application development and integration with Snipcart's webhooks. It displays the full details of the HTTP request sent to your application and the response received from your end.
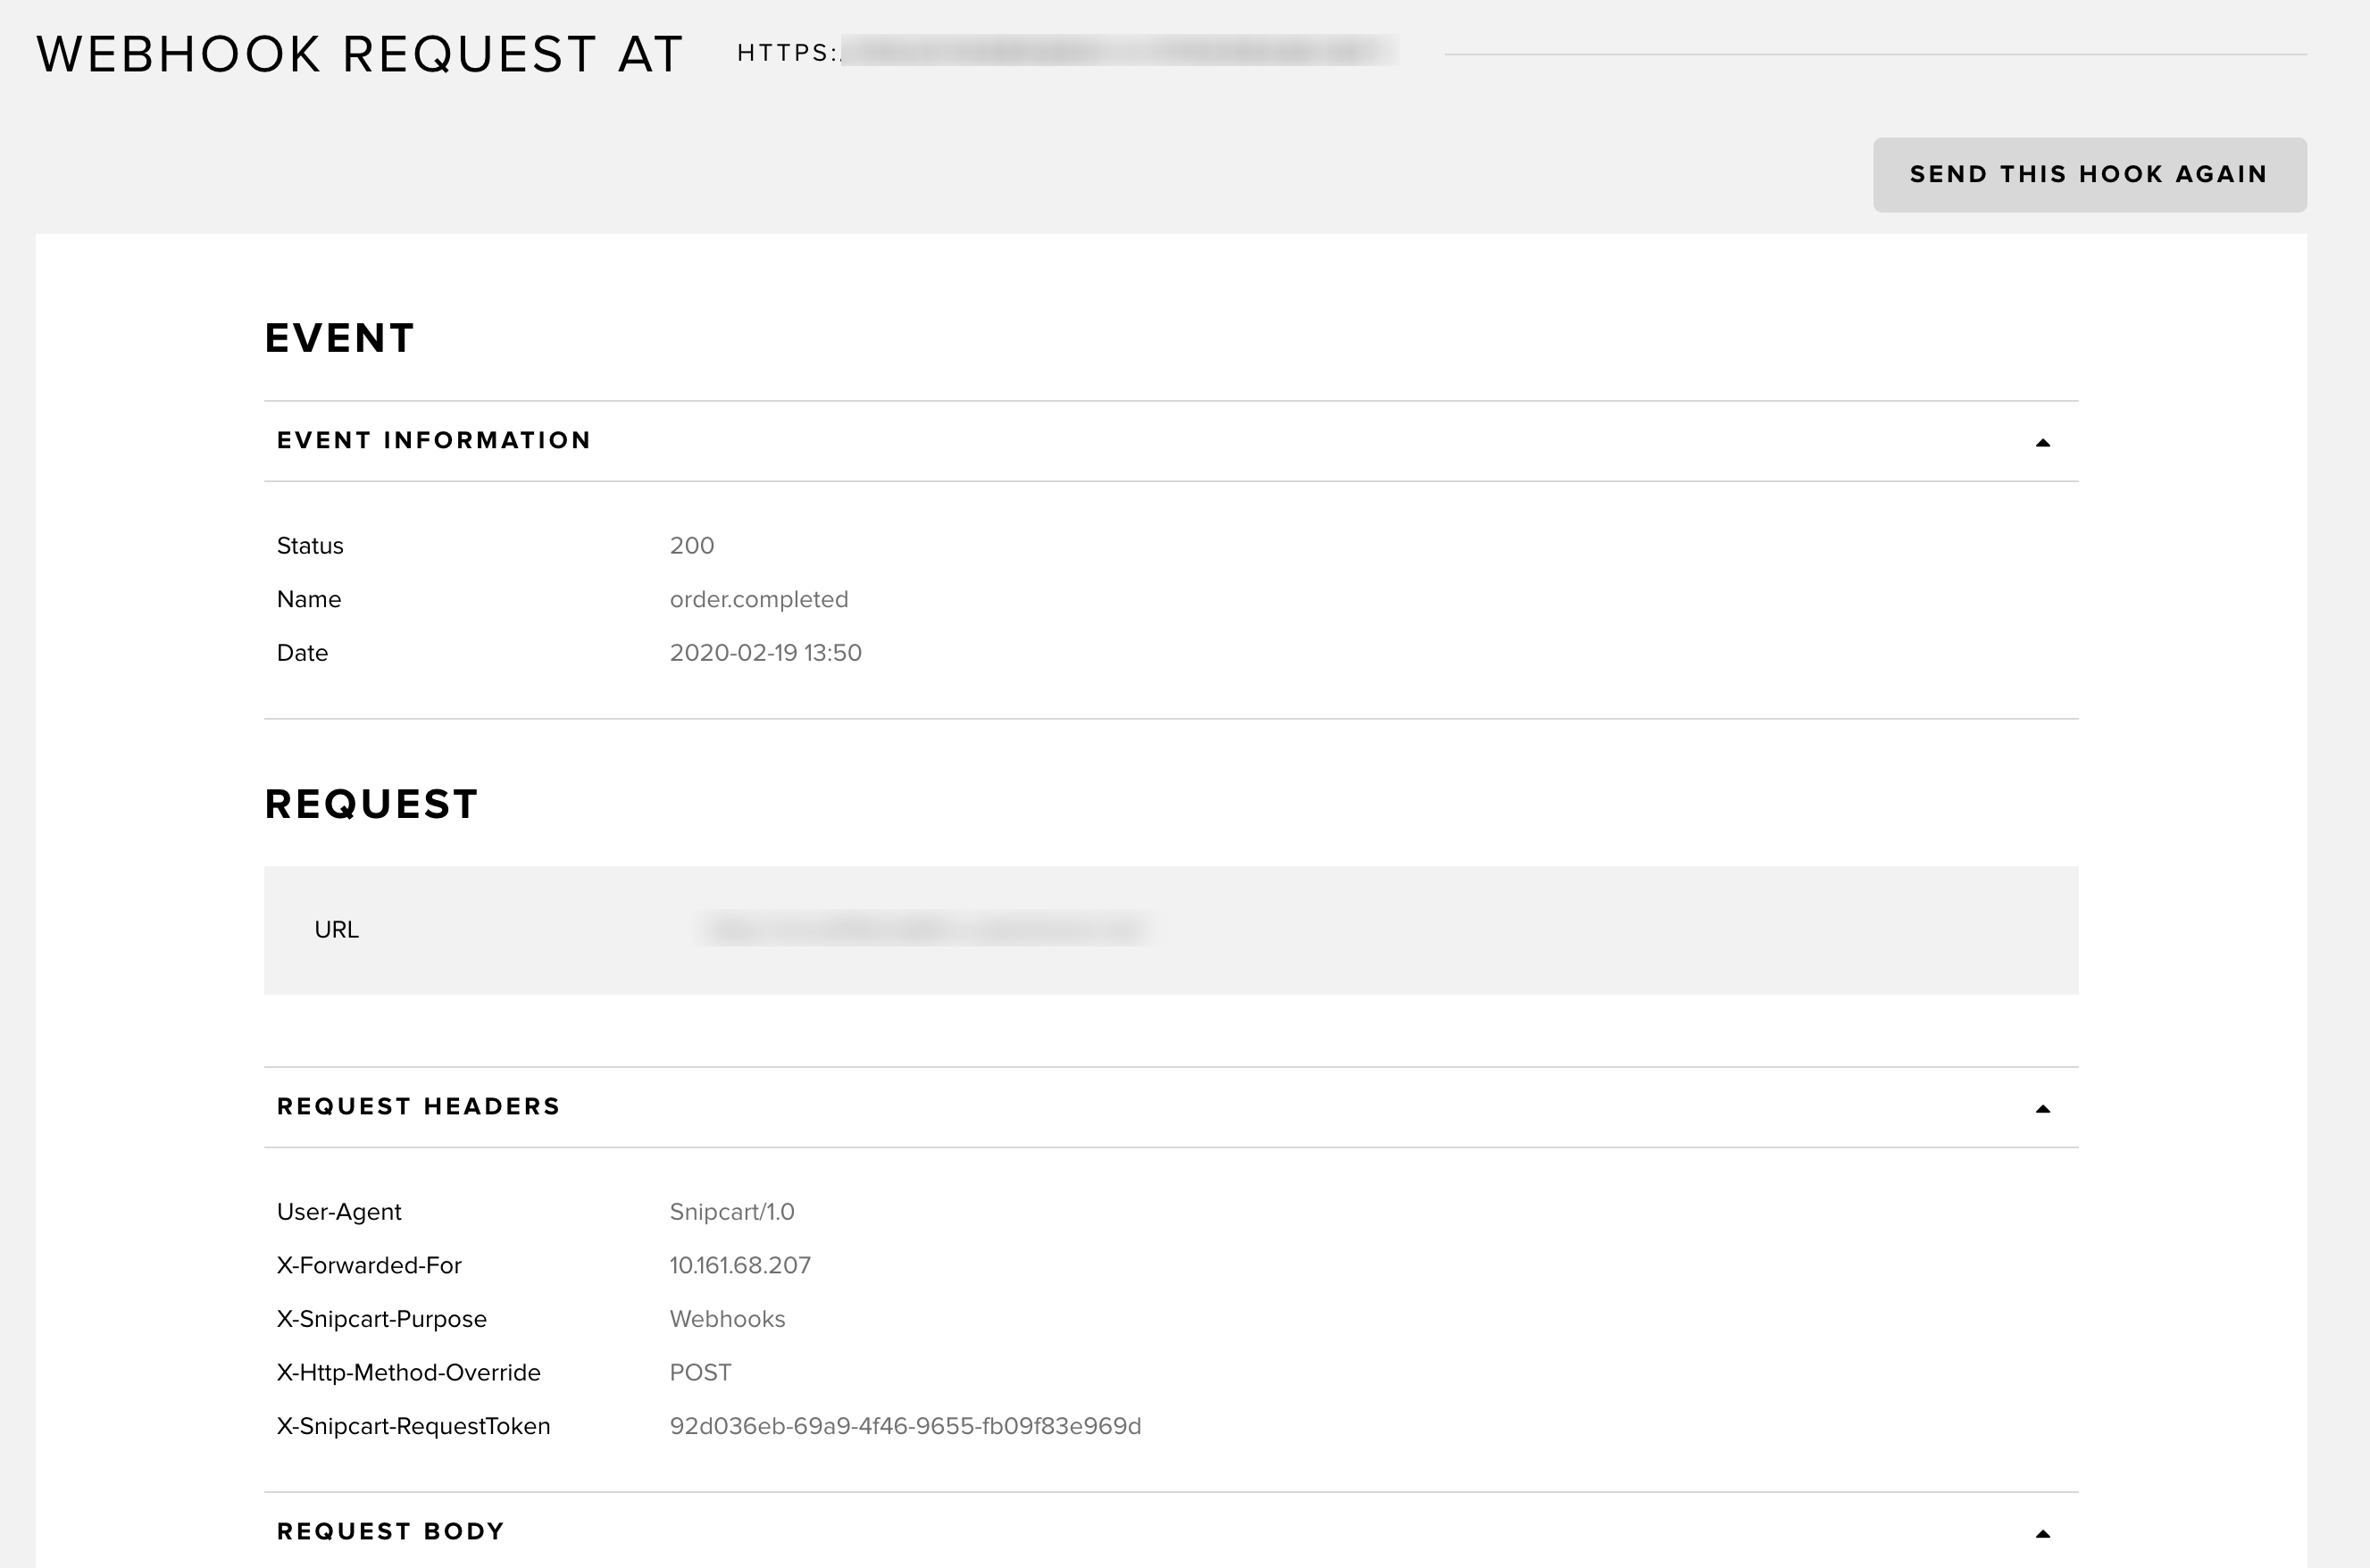
The Send this hook again button triggers a repeat call from Snipcart to your application, aiding in debugging.
Securing Your Webhook Endpoint
To ensure the authenticity of requests from Snipcart, especially for protected data, use the X-Snipcart-RequestToken header. This header, added to each outbound request, contains a token valid for one hour. You can verify this token by making a GET request to https://app.snipcart.com/api/requestvalidation/{token}, functioning as a form of digital handshake.