Sendgrid is the message delivery service employed by Snipcart for all email communications. Snipcart users are afforded the flexibility to either leverage their personal SendGrid account for enhanced control and customization over email functionalities or opt for the convenience of utilizing Snipcart's shared SendGrid account, with no mandatory requirement to establish a personal account.
Use your own Sendgrid account
Generating an API key
To integrate your Snipcart with SendGrid, begin by creating an API key within your SendGrid account. Access this feature by navigating to the "Settings" menu located on the left side of your SendGrid dashboard, then proceed to select "API Keys."
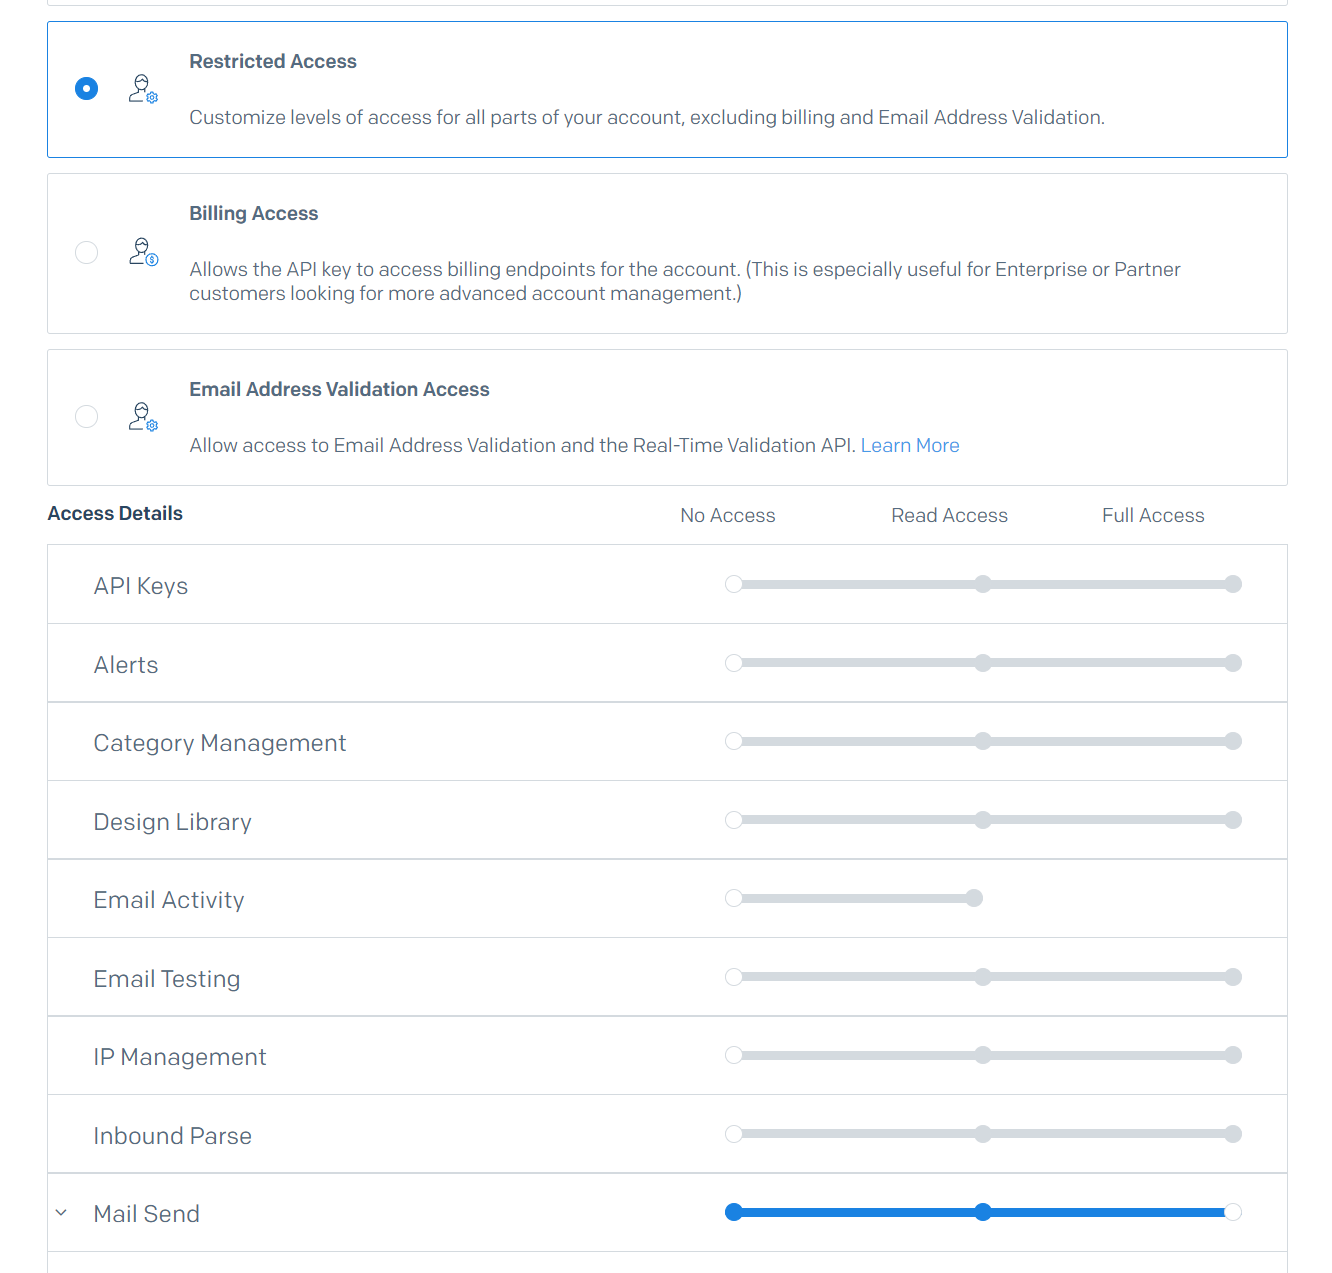
Press the "Create" button, creating a new API key. Name it something identifiable, such as "snipcart". Snipcart requires the "Mail Send" permission for email dispatch. Opt for "Restricted Access" and specify this permission:
Save the API key and make sure to copy it for future use.
Adding the API Key to Your Snipcart Account
Once you've copied the API key, go to your Snipcart dashboard's Sendgrid Settings and paste it into the designated field for safekeeping. It's important to note that this API key is mode-specific; you can configure it for either "Test" or "Live" mode, or both.
For integration verification, dispatch a test email to yourself using any available template. Edit the template by clicking "EDIT," then choose "Send me a test email" to initiate a test email to the mailbox tied to your current Snipcart account. Observe this activity within your SendGrid dashboard for confirmation.
Authenticate your email domain with our shared Sendgrid account
Opting for Snipcart's shared SendGrid account necessitates domain authentication of your sender email to augment deliverability. If your domain has been previously authenticated with us, no further action is required. Additional details can be found in Sendgrid's website.
Domain Addition Process
To authenticate, add your domain in the Sendgrid Settings within your Snipcart dashboard and submit. A lack of response signifies pre-existing authentication; for clarification, reach out to support@snipcart.com to validate it is the case. If new, you will be directed to a page displaying DNS entries for addition:
