Store configuration
You can access this area by clicking on the user icon at the top right corner of the screen.
Sections in this area will allow you to configure administrative settings like payment gateways, taxes, shipping, and more.
1. Payment gateway
You must provide billing information under Account → Billing & payments before choosing a payment gateway.
Connecting a payment gateway will not activate your billing cycle. You can conduct unlimited, free test transactions in the Test environment before going Live.
You can connect only one main payment gateway to a Snipcart account. In this section, you'll see the payment gateways we support. Select the gateway you want to connect and follow the instructions from there.
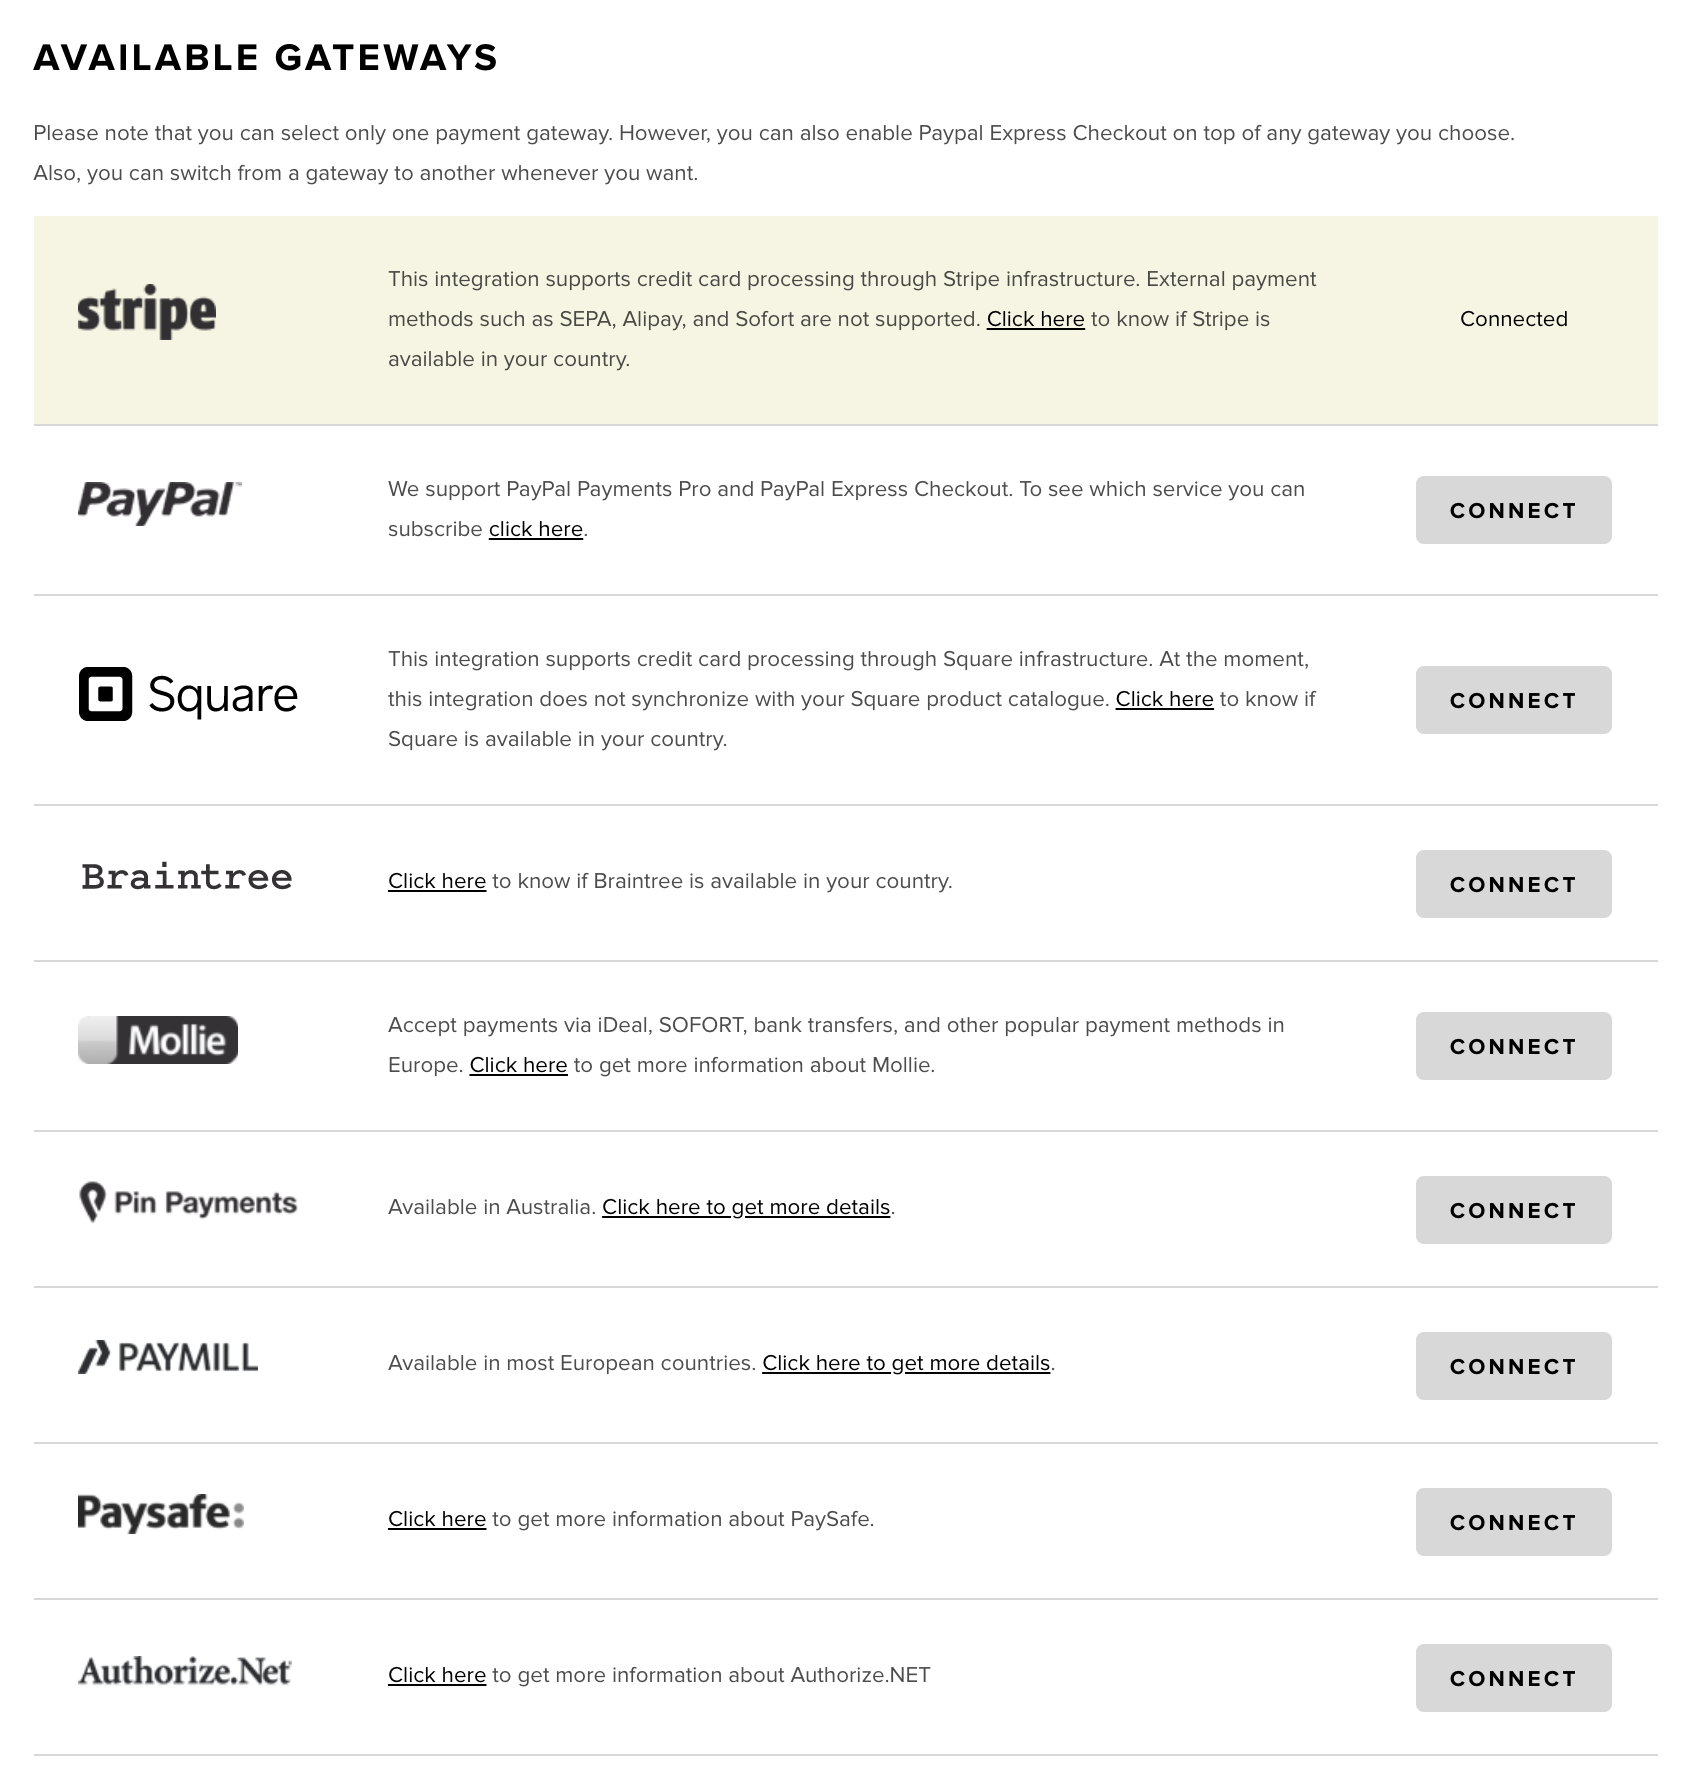
In the example above, Stripe is connected to the Snipcart account.
Custom payment gateway
Developers can integrate their own payment gateway into Snipcart.
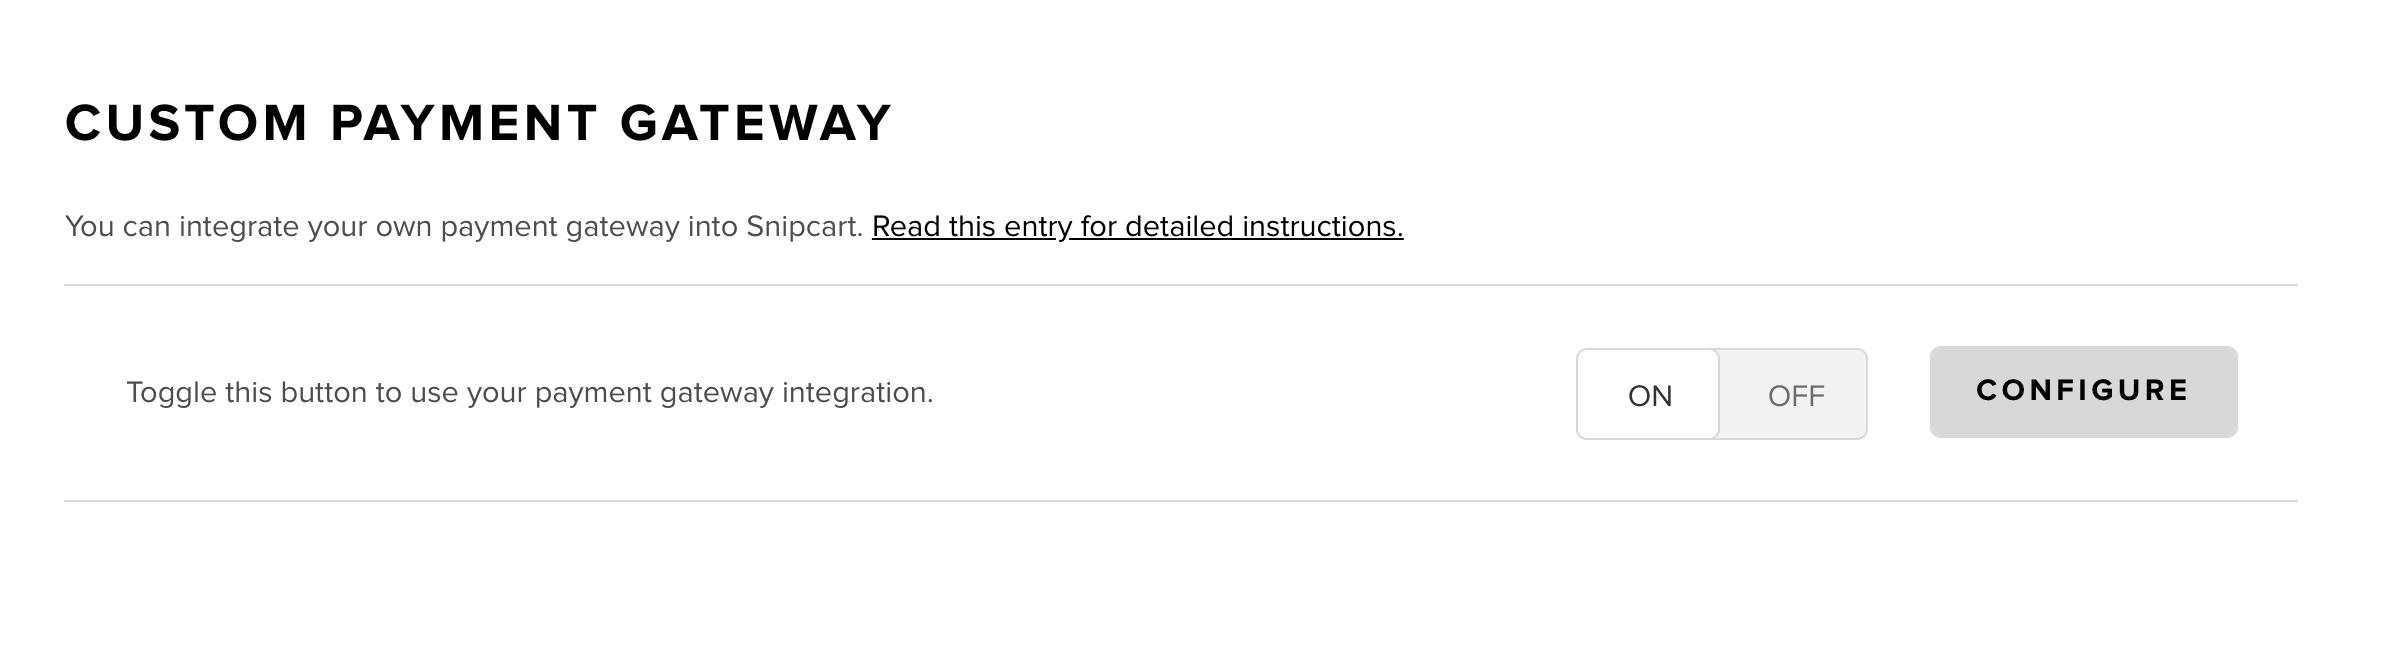
Read this entry to get started with custom payment gateways.
Deferred payments
Enabling this will allow customers to place orders on your online store and pay later via either check or other manual payment methods.
Once you enable deferred payments you'll be able to access the configuration section and you will get this option: Only allow deferred payments. If you don't want any payments to be processed on your store via credit cards online, mark this box.
PayPal Express Checkout Payments Pro
Read this entry for PayPal Express Checkout & PayPal Payments Pro configuration.
2. Taxes
This section allows you to create the different tax rates needed for your e-commerce site.
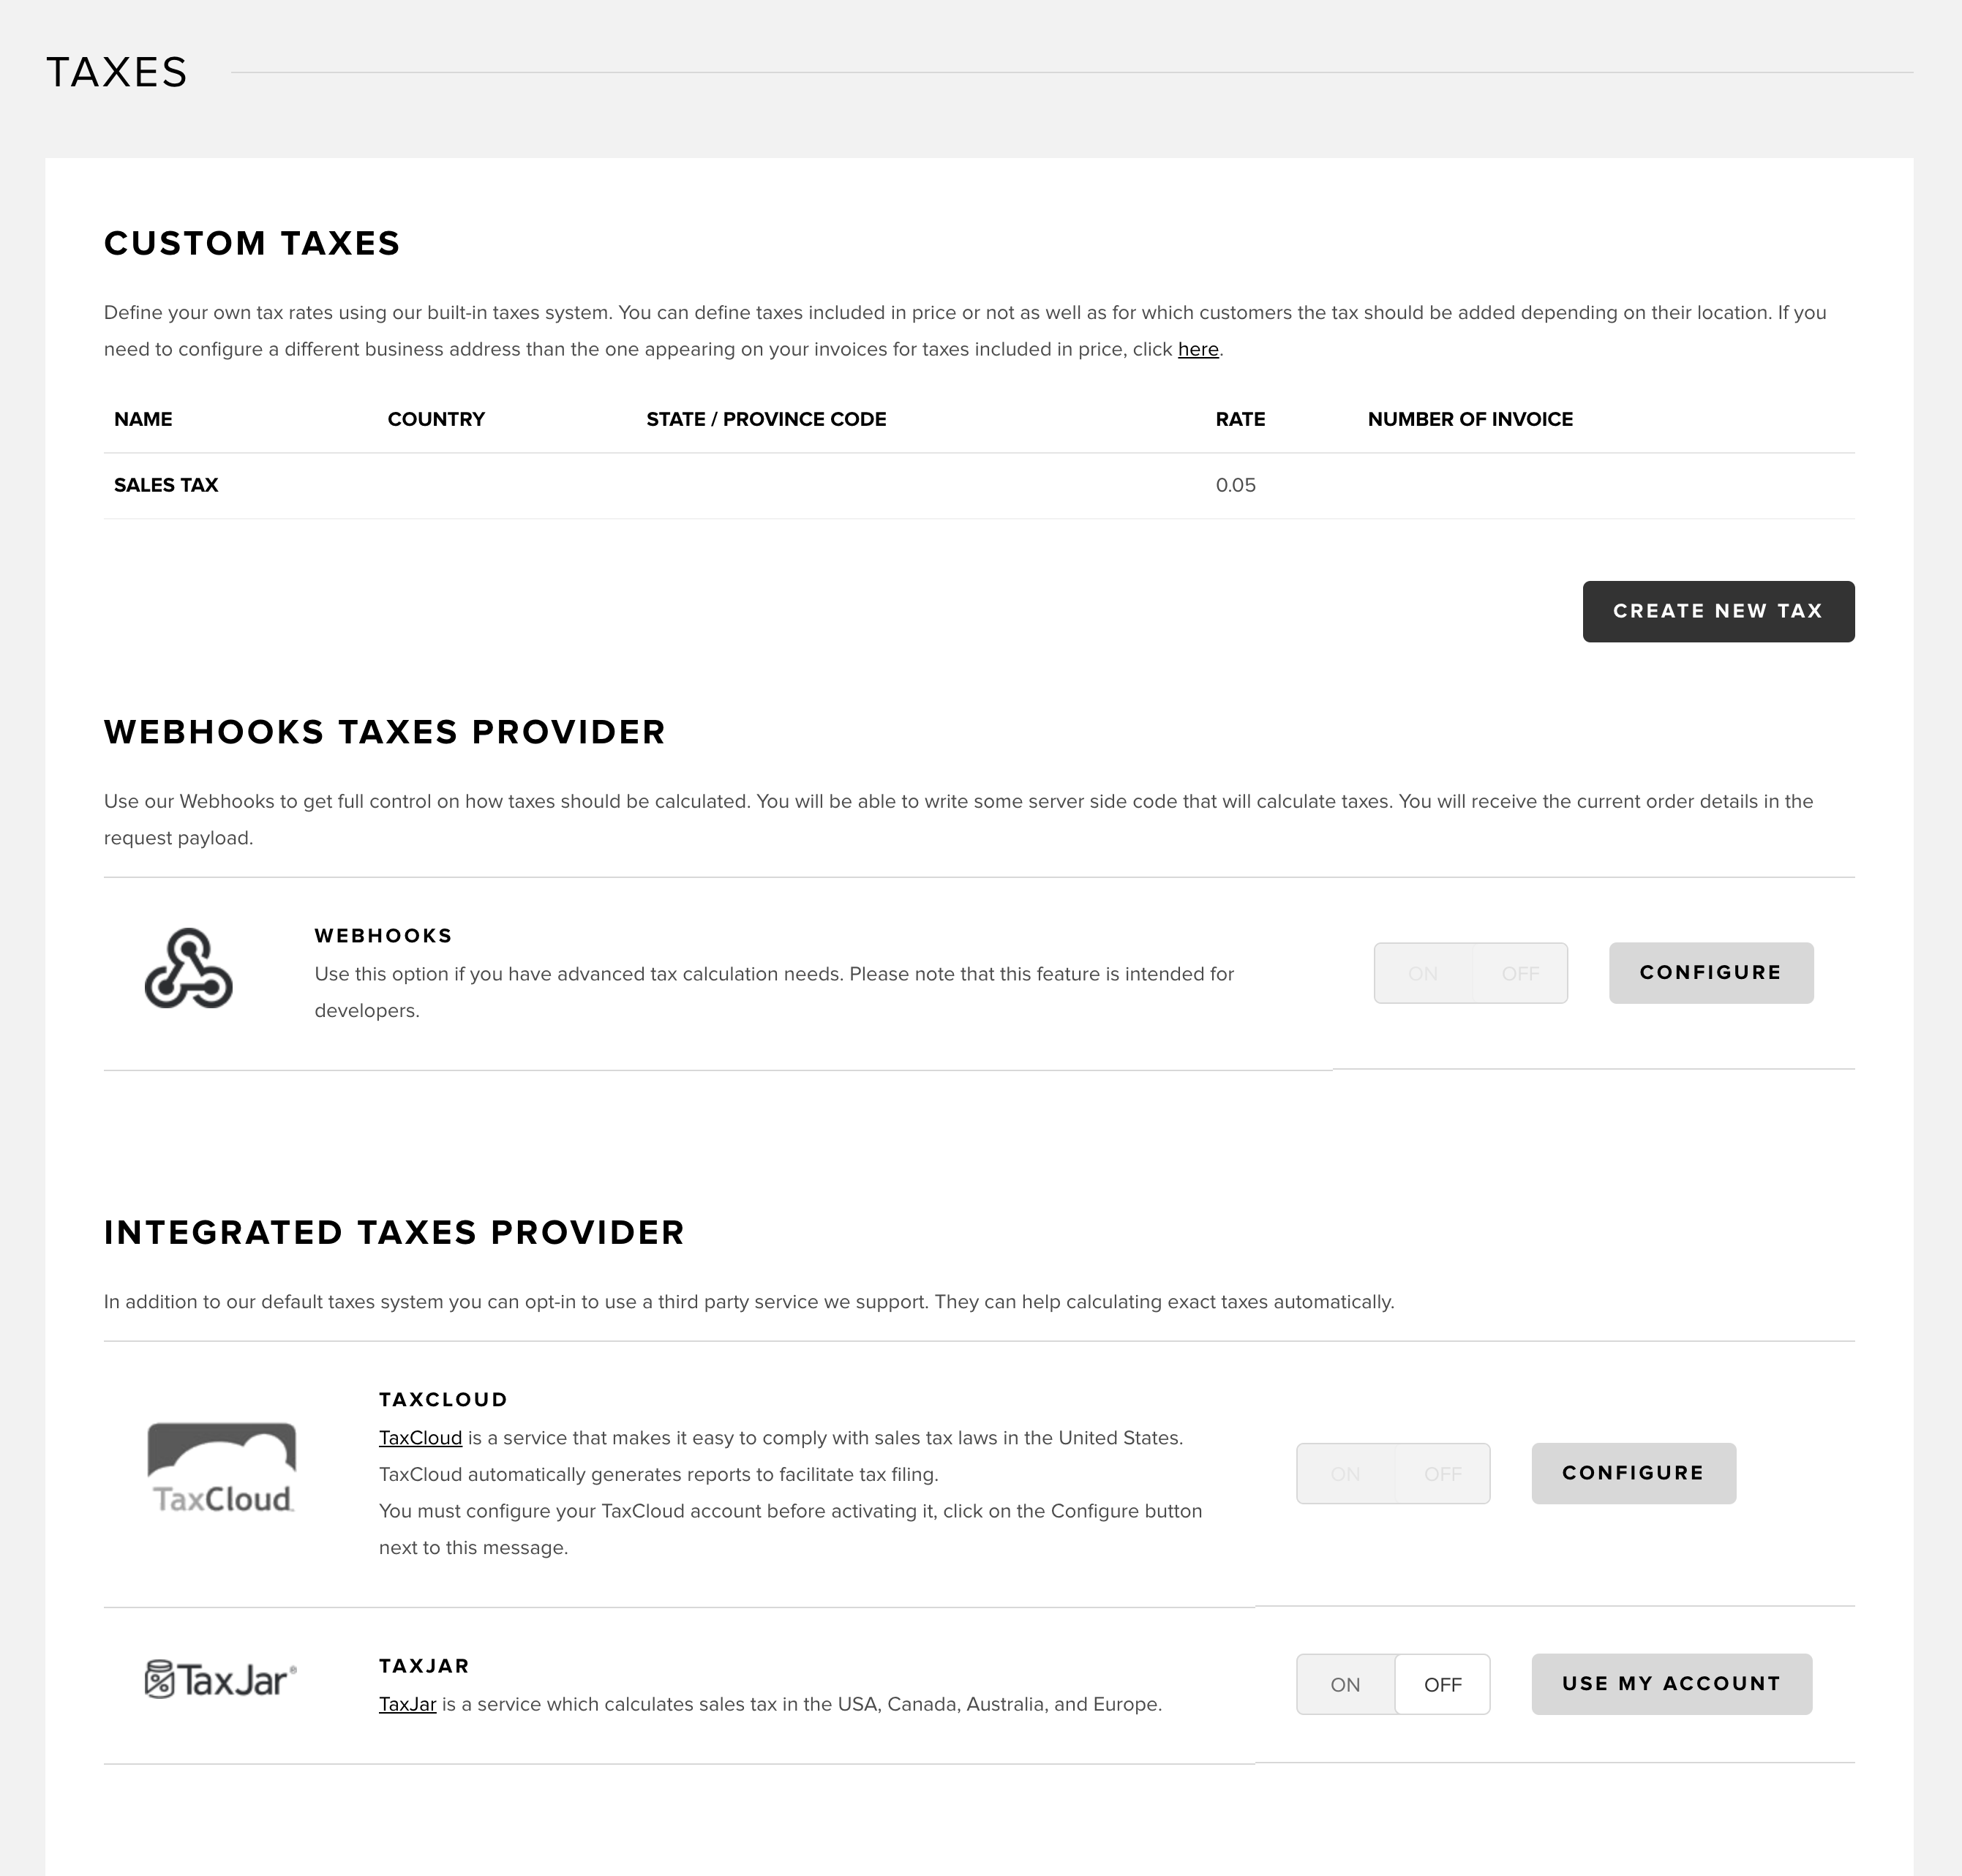
To learn how to configure taxes with Snipcart, read this entry.
3. Shipping
In this section, you can connect with one of the shipping providers we support or set up your own shipping methods. Note that both shipping provider rates & custom rates can be offered at the same time.
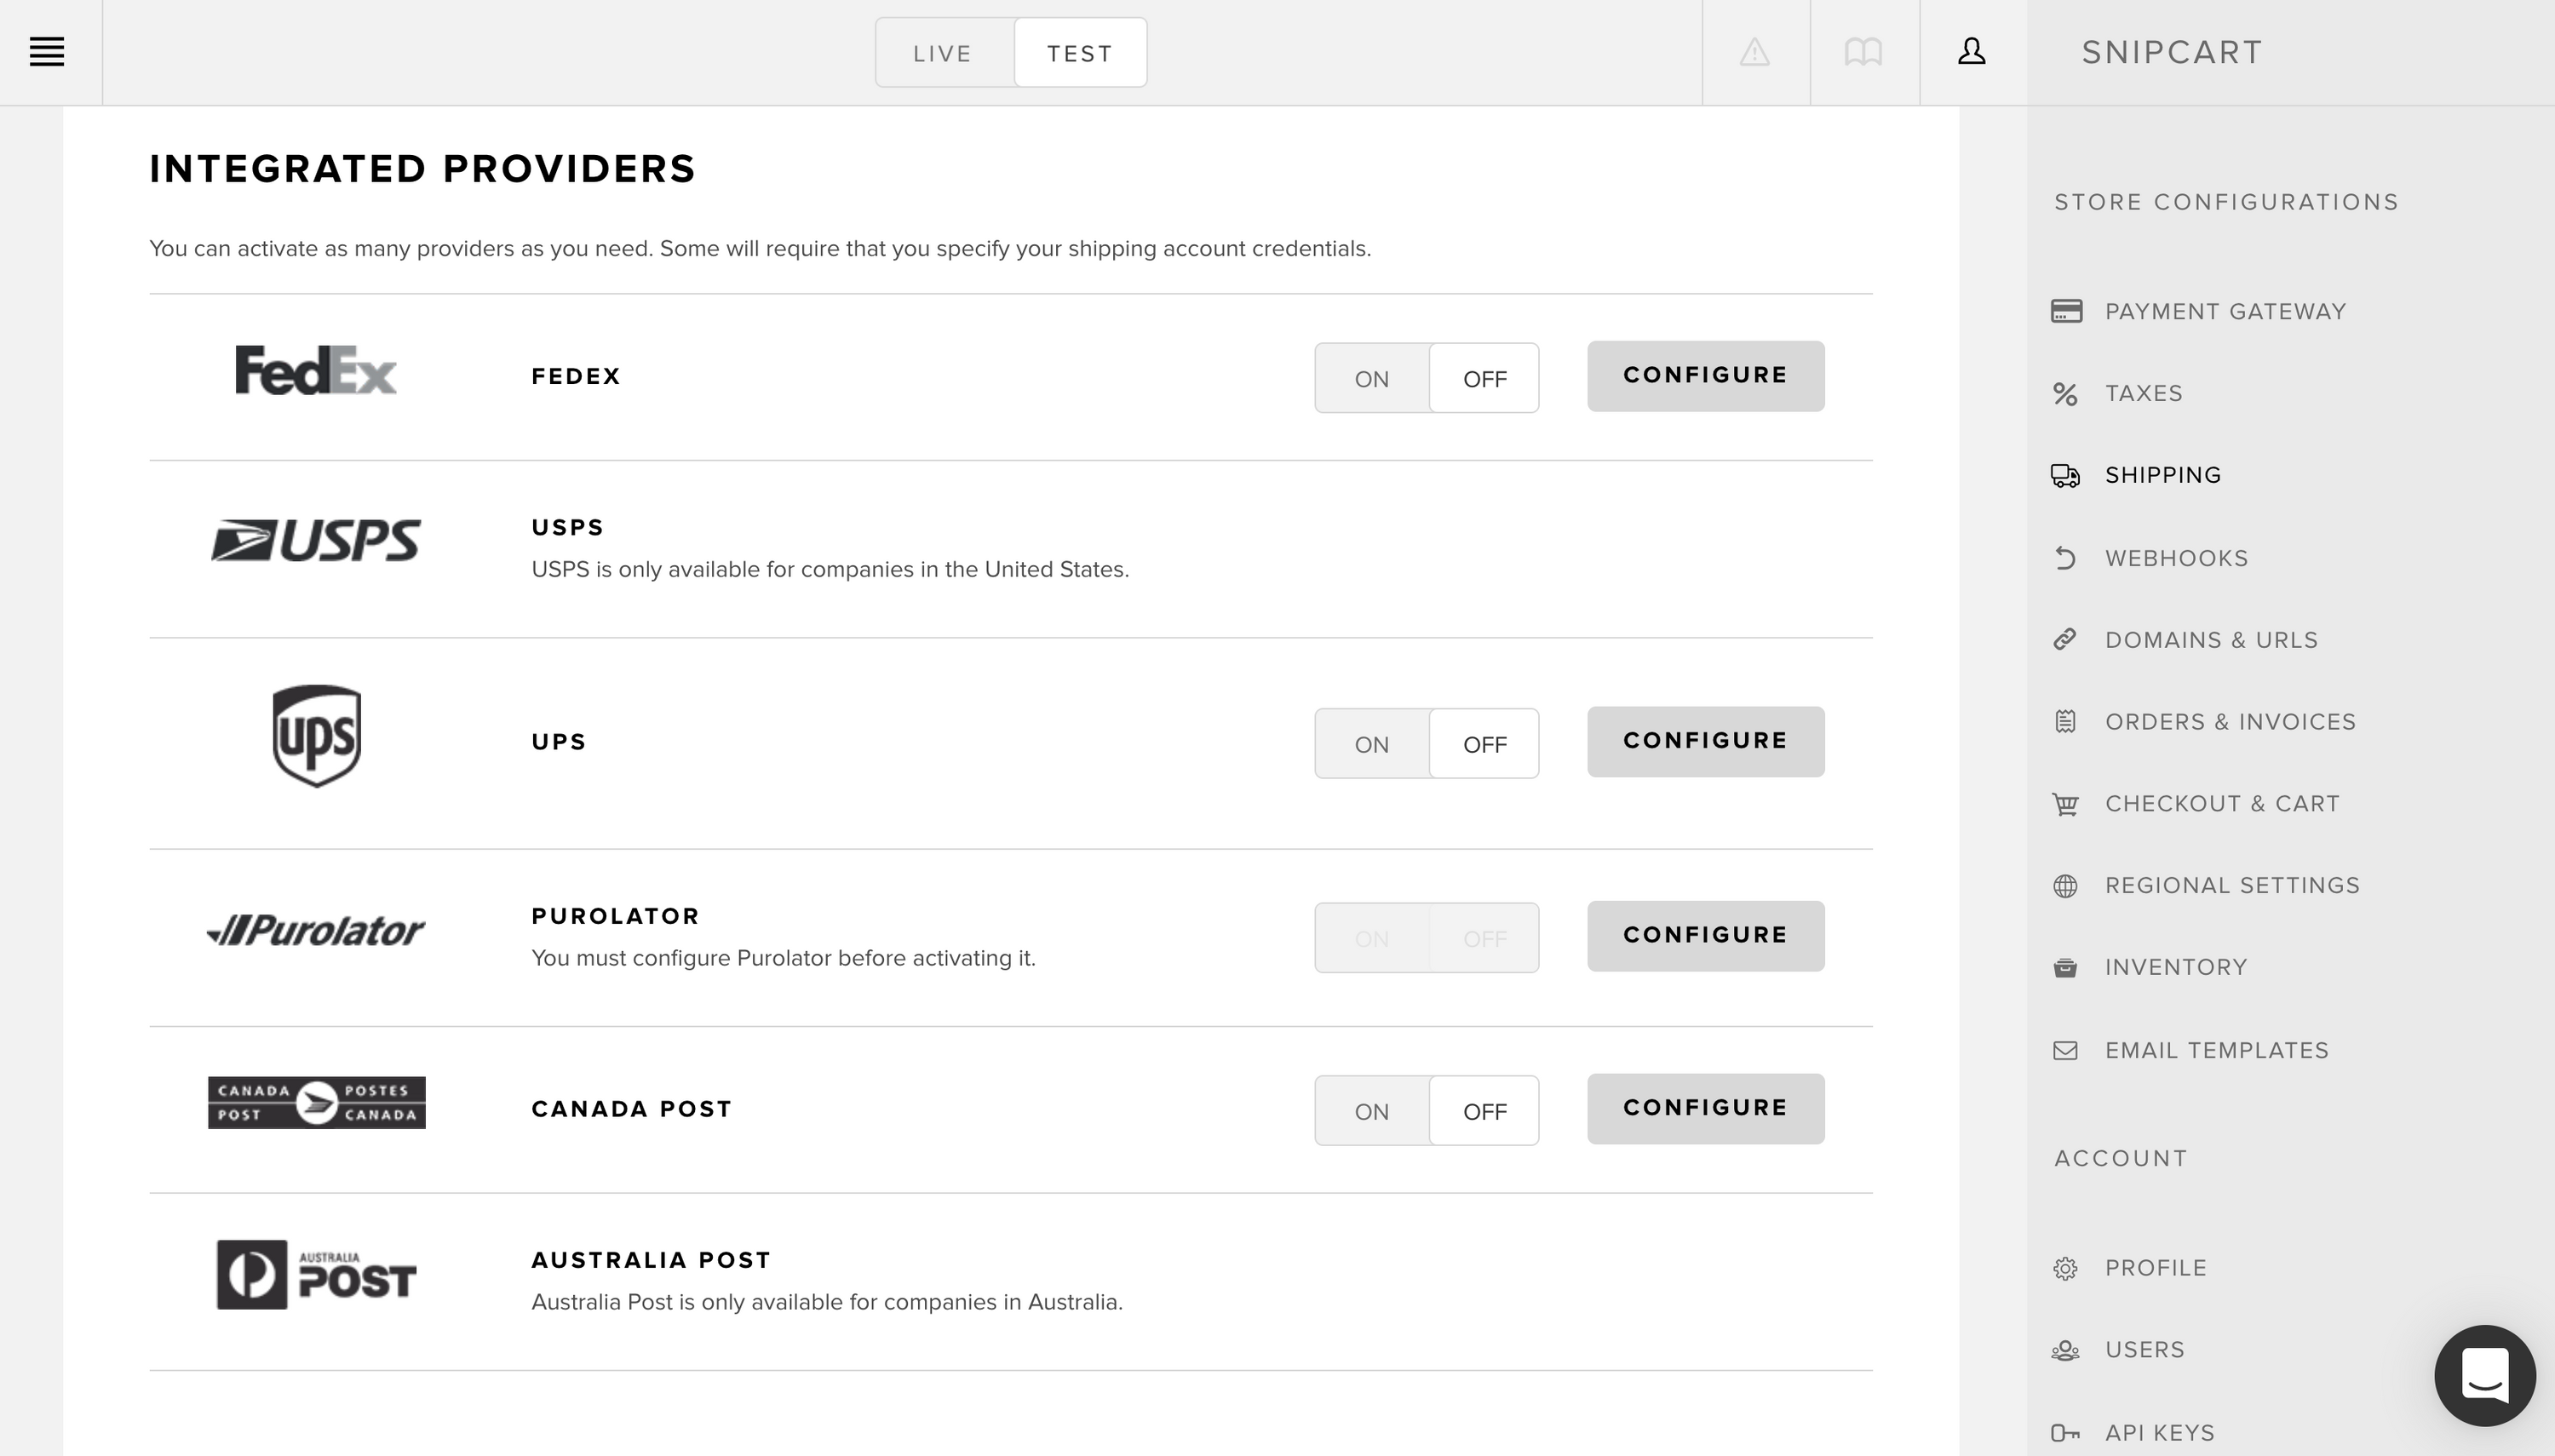
To learn how to enable and configure shipping with Snipcart, read this entry.
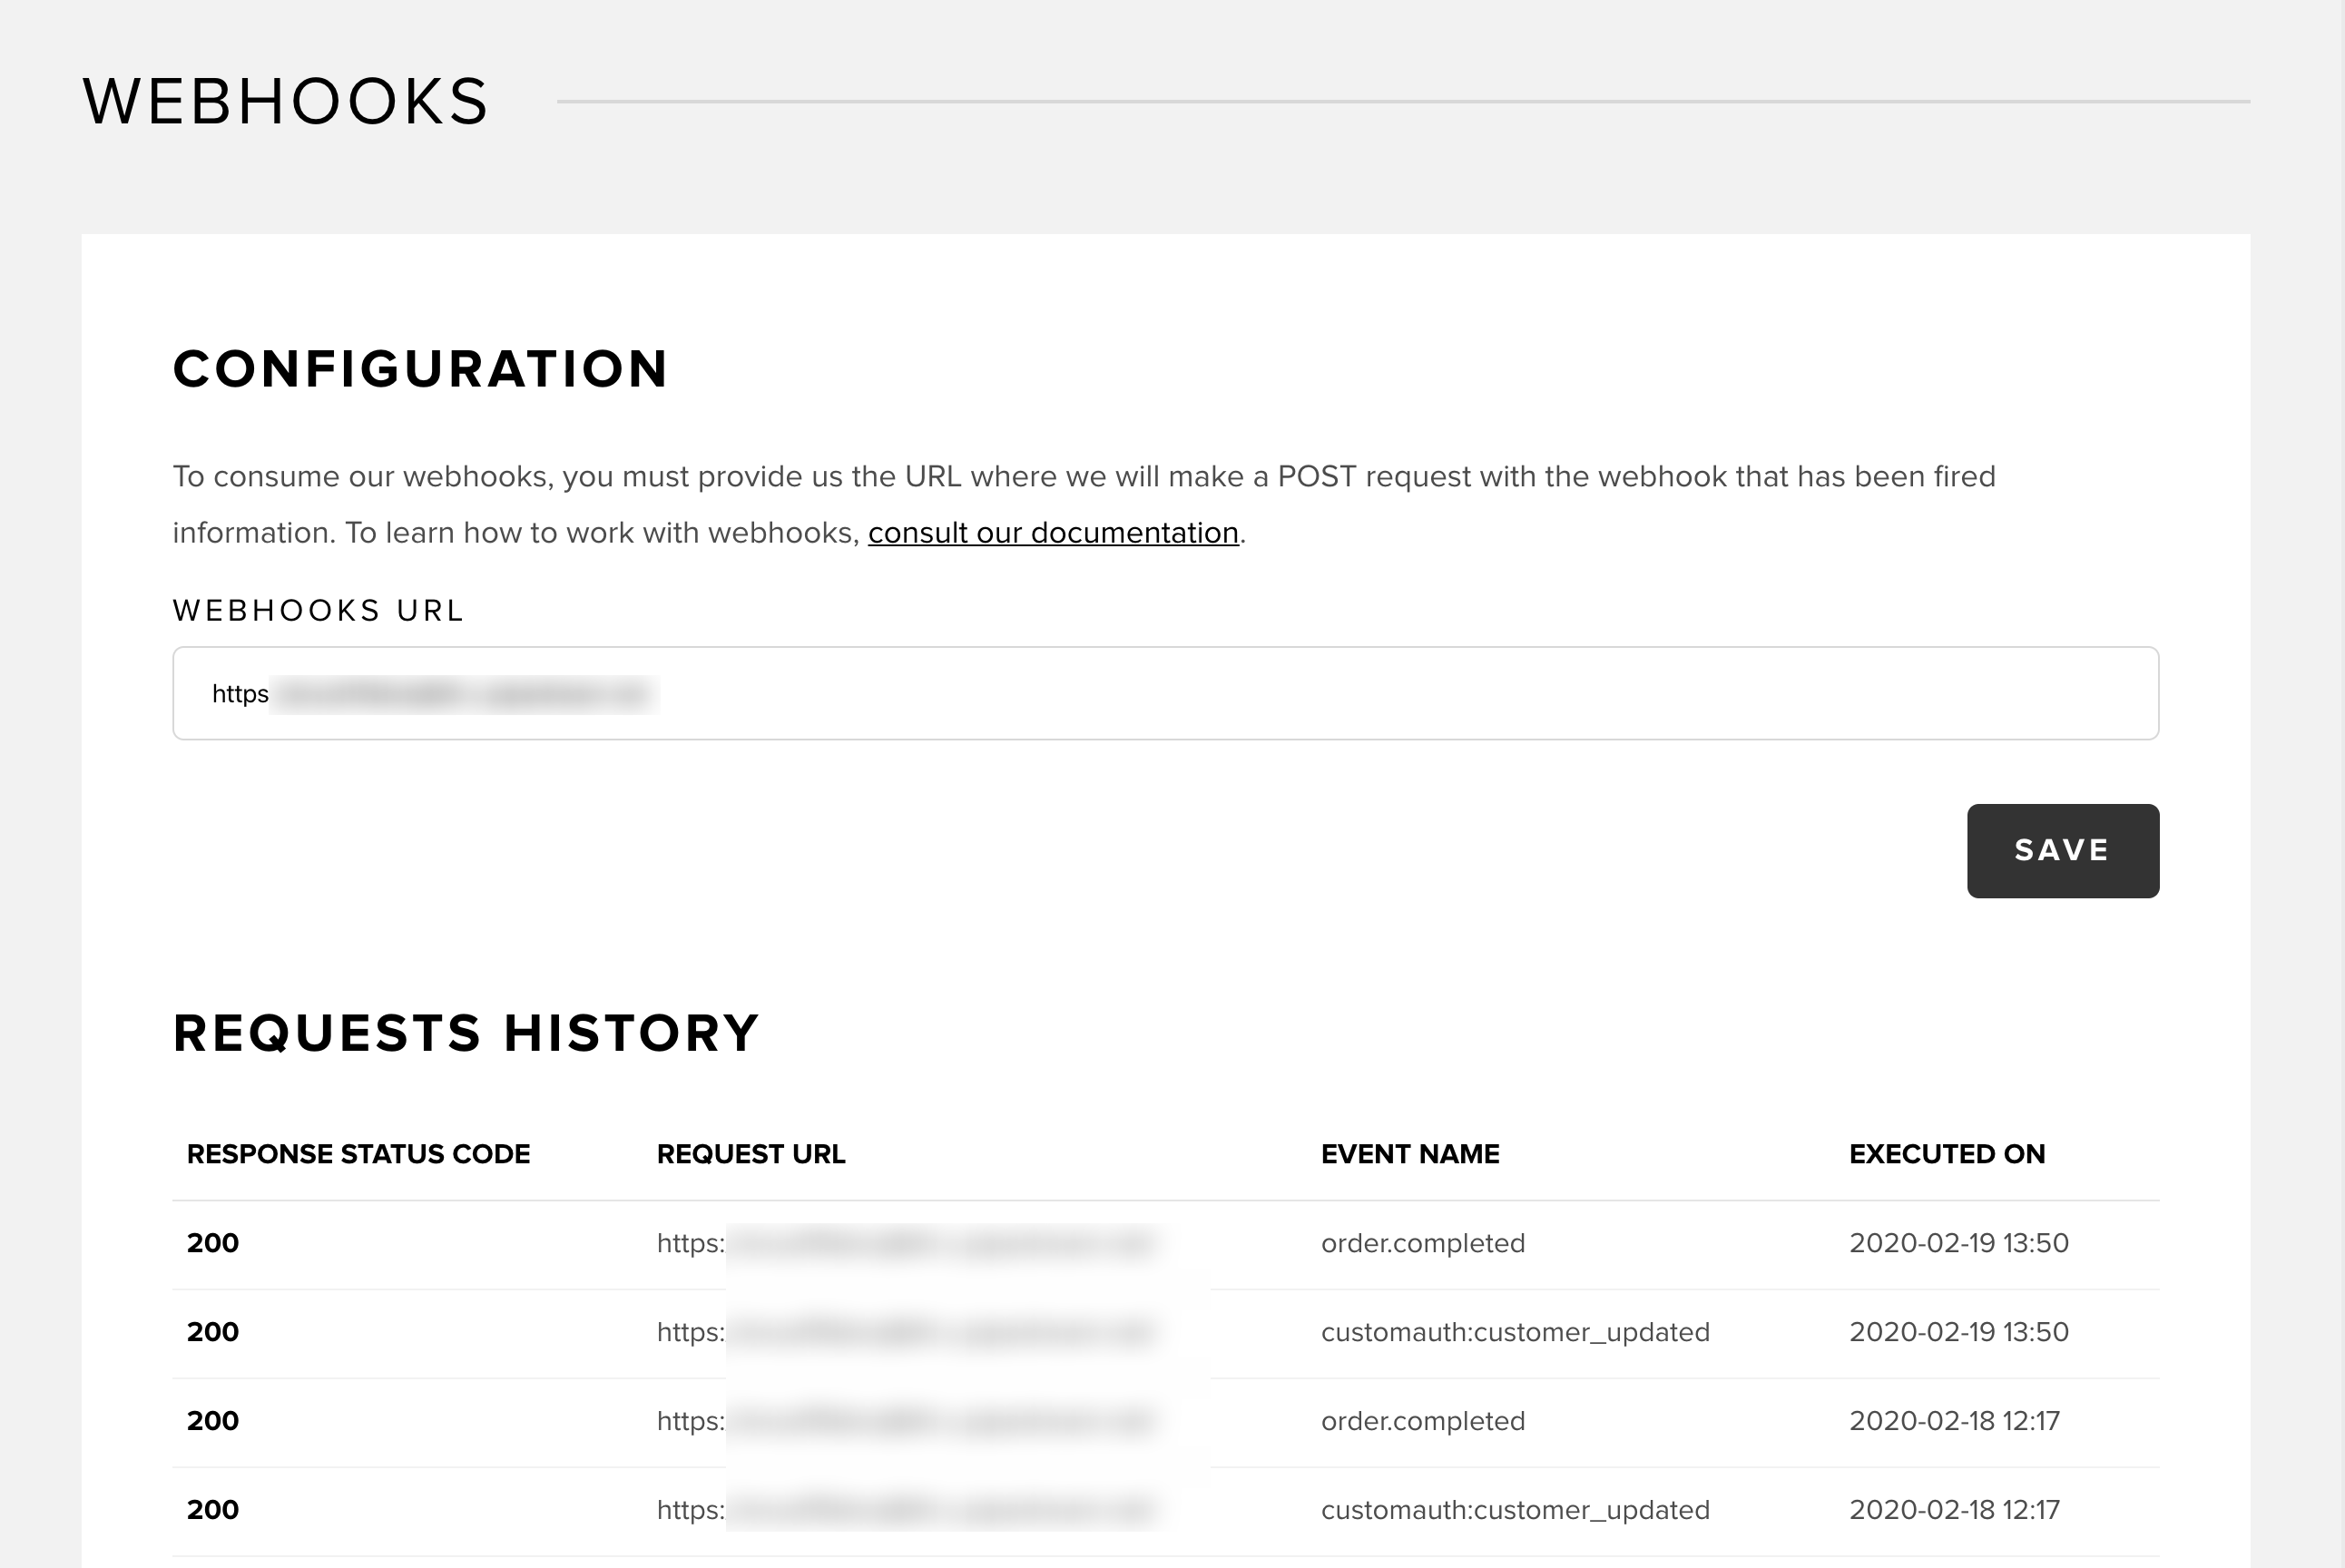
4. Webhooks
In this section, you can use webhooks to make Snipcart's application communicate with other applications (email marketing, shipping automation, inventory management, CRM, etc.). To learn more about webhooks, read this entry.
Request details
If you click directly on a webhook request URL entry, you'll access its details page.
The latter can be very helpful when developing your application and integrating with our webhooks. You can see the complete details of the HTTP request that we sent to your application. You'll also see the response we received from your side.
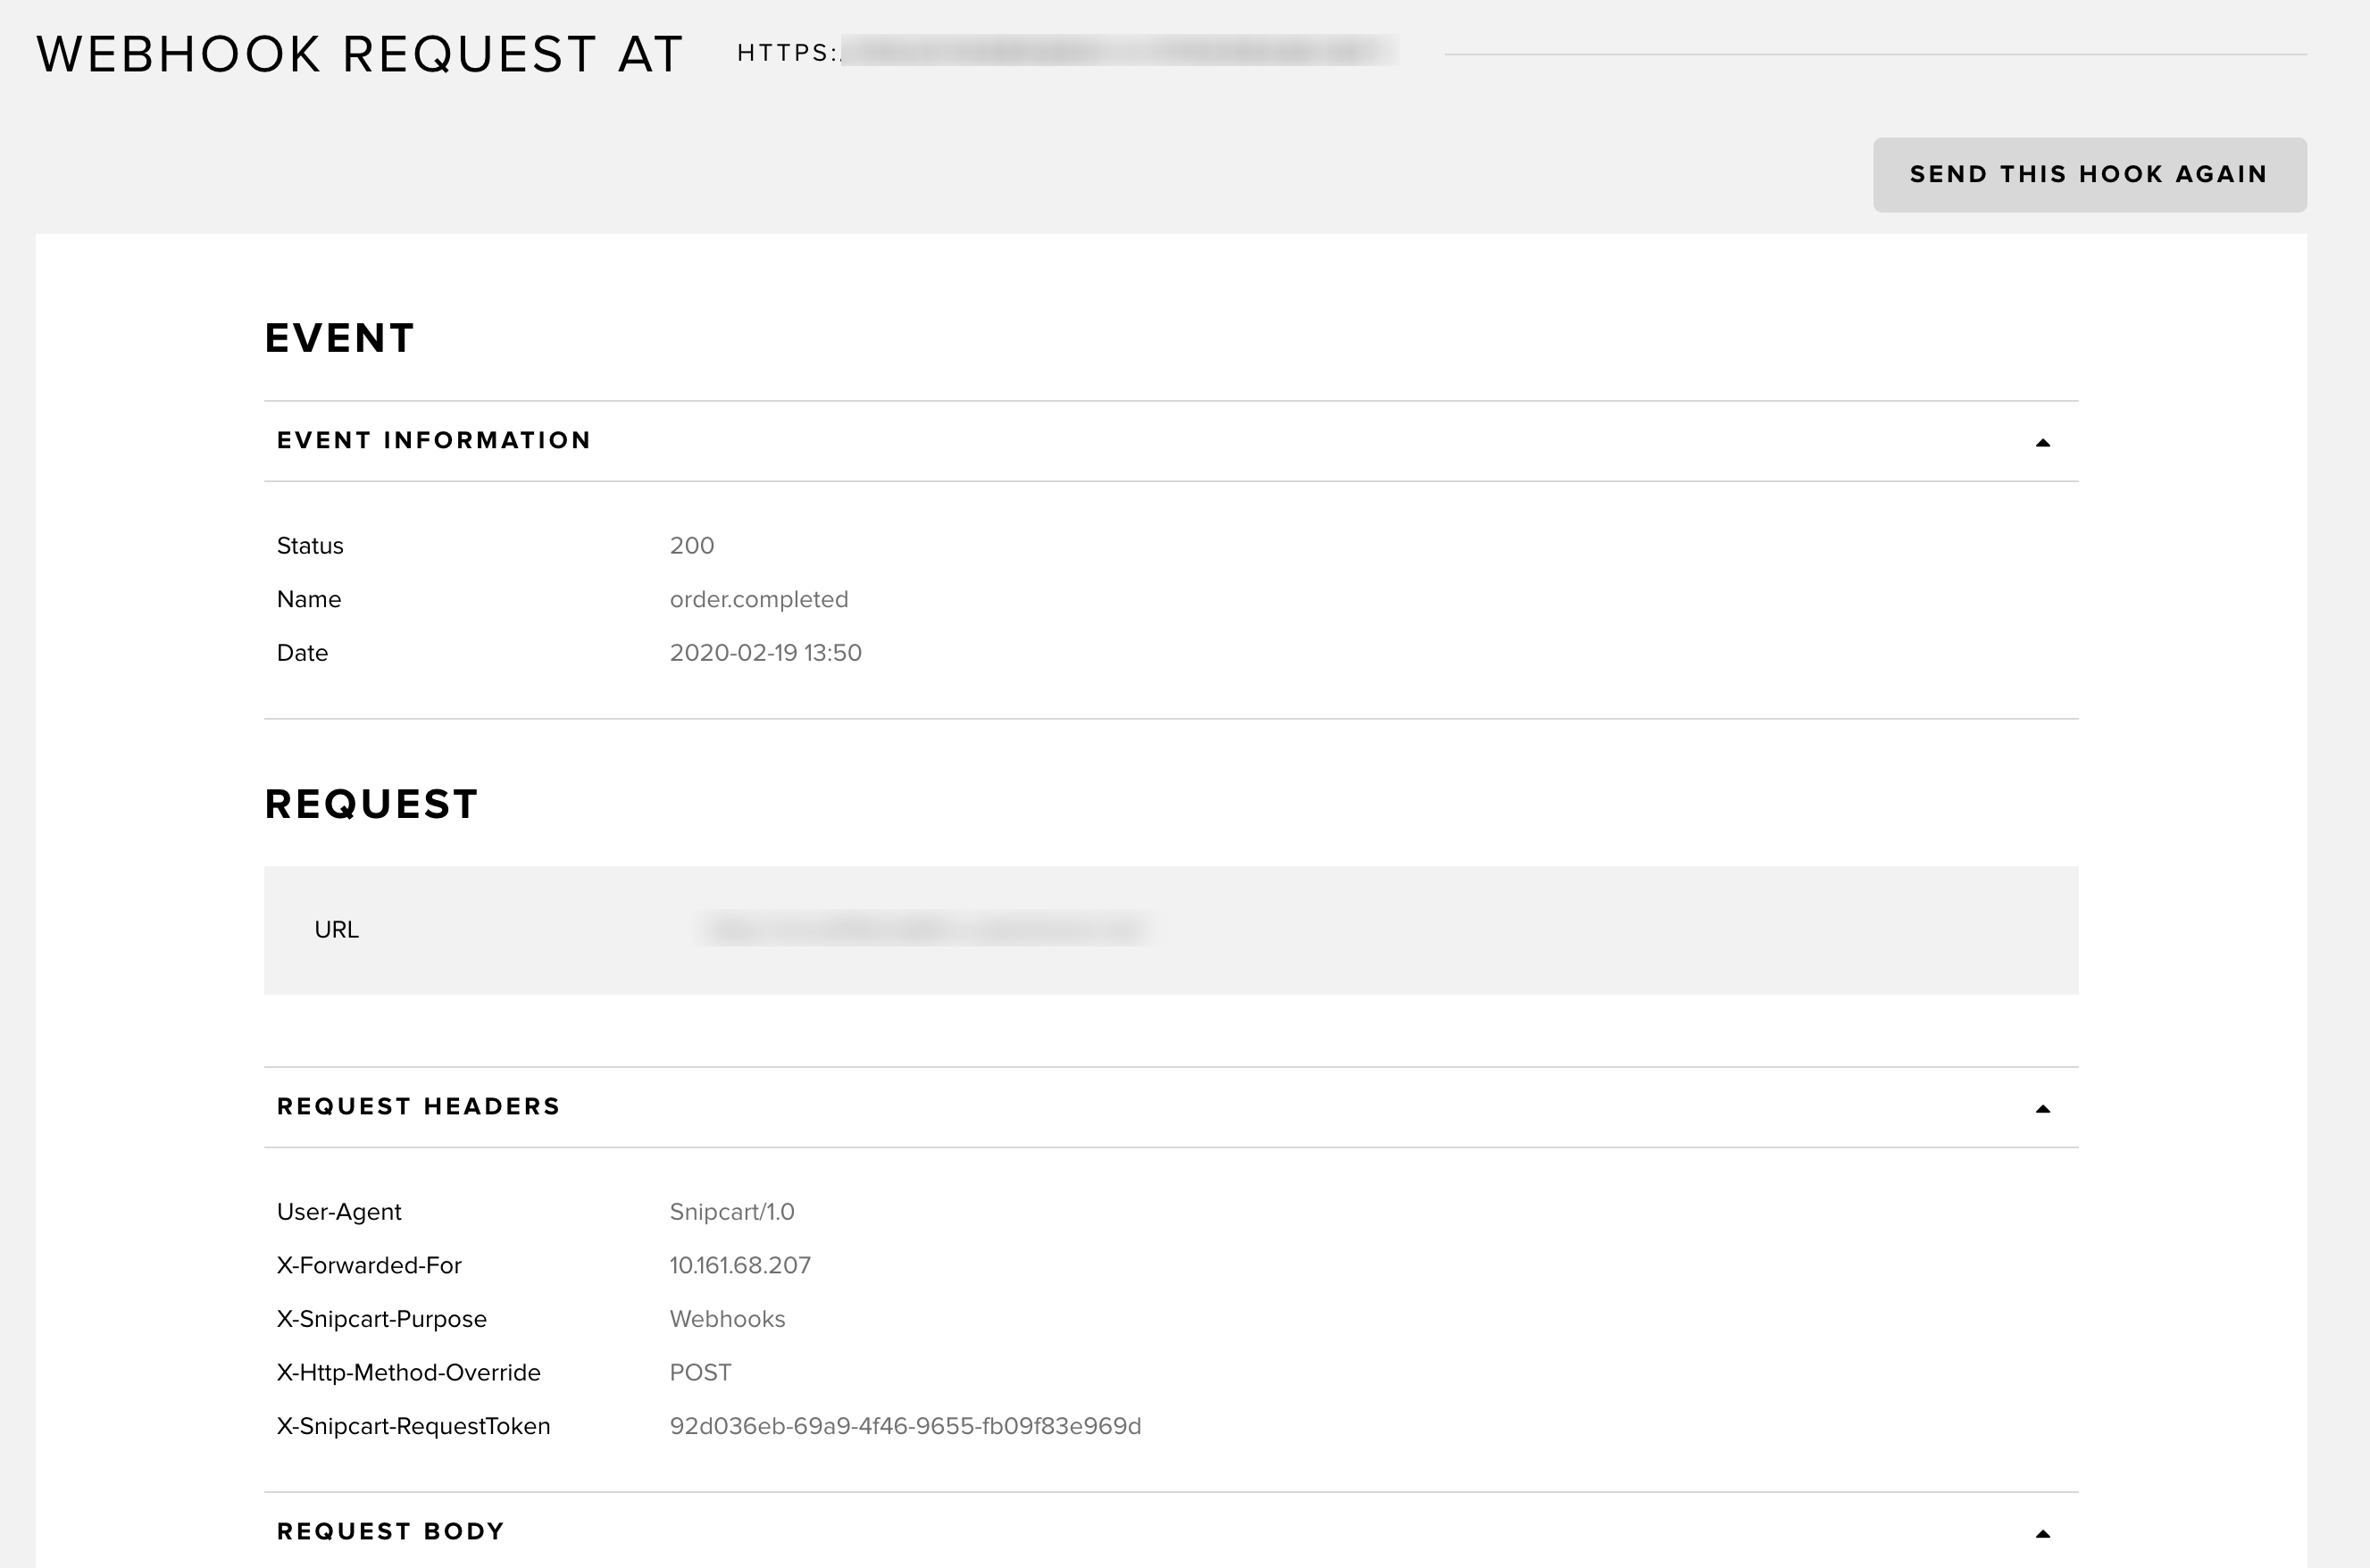
Using the Send this hook again button will trigger another call from our application to yours. It can be helpful when debugging.
5. Domains URLs
Use this section to determine which domains and subdomains your Snipcart store can live on.
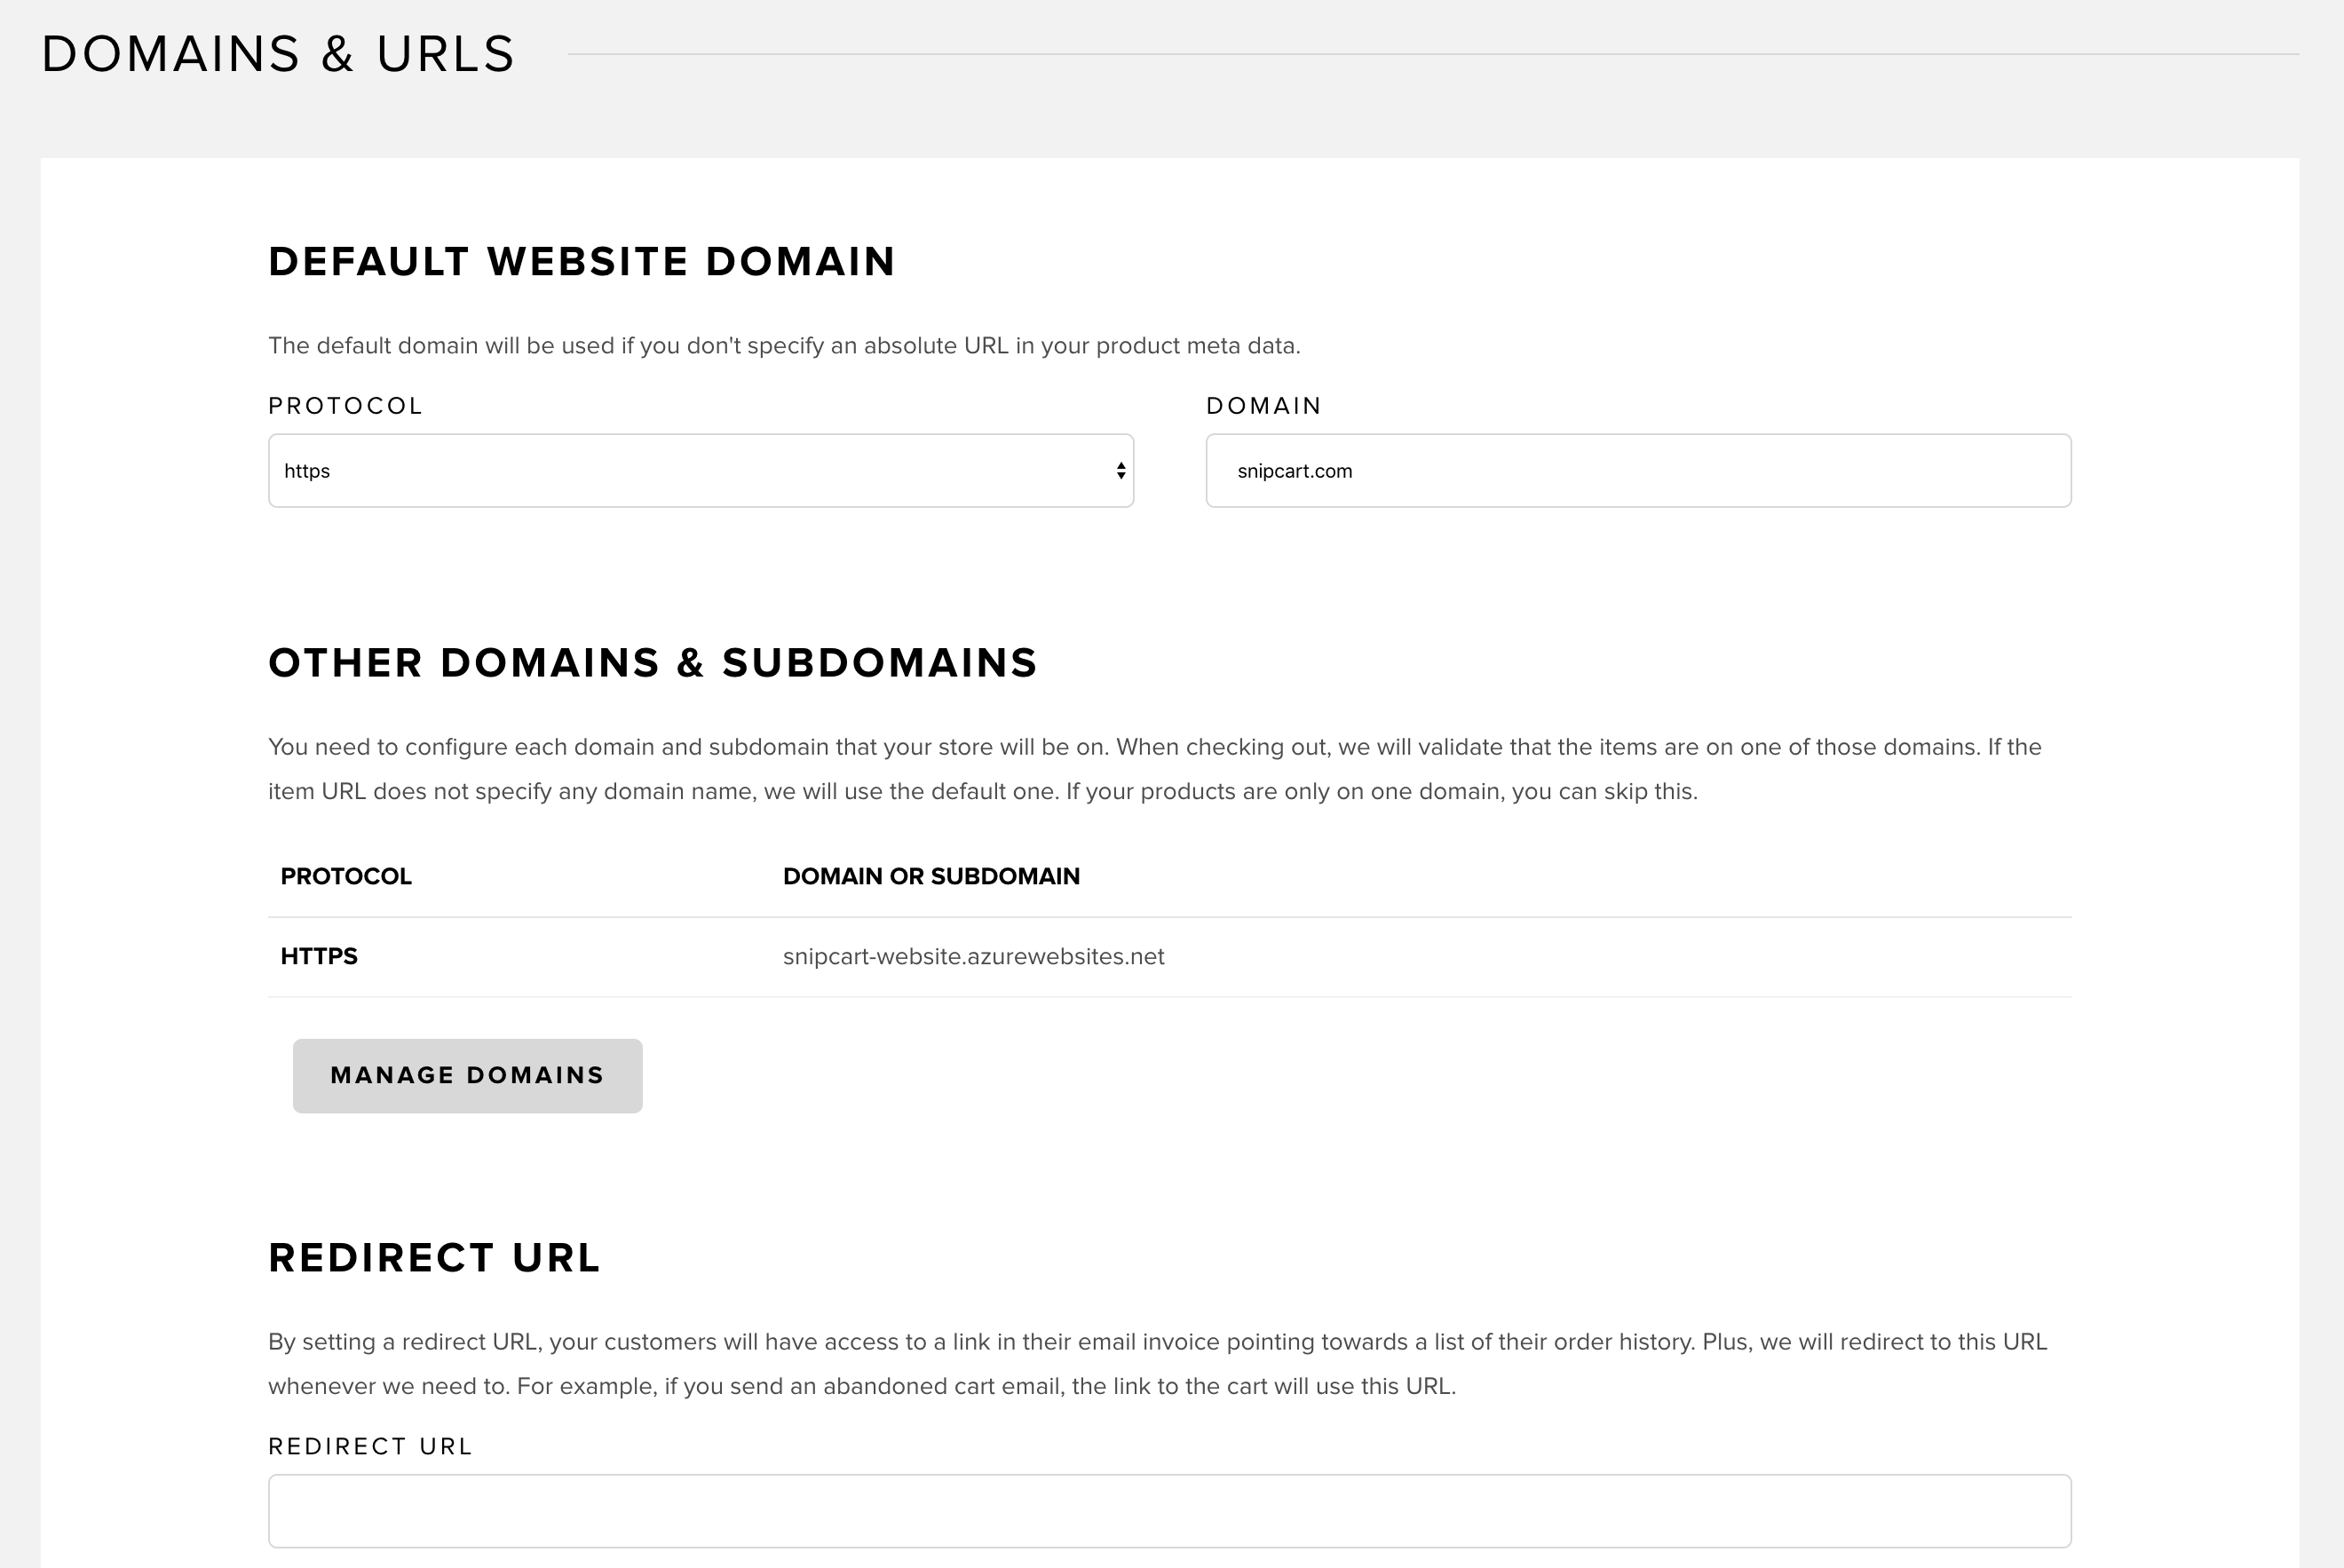
Default website domain
If you're using relative URLs to define your products data-item-url properties, Snipcart will always assume the default website domain entered in this field is used.
If you're using the same Snipcart account on different domains and subdomains, you need to use absolute URLs for the data-item-attribute property of your products.
To learn more about product attributes definition, read this entry.
Other domains subdomains
You can skip this section if your Snipcart products are sold on a single, unique domain.
This section allows you to add domains and subdomains across which your Snipcart store will work. Hit Manage domains . You'll reach this screen:
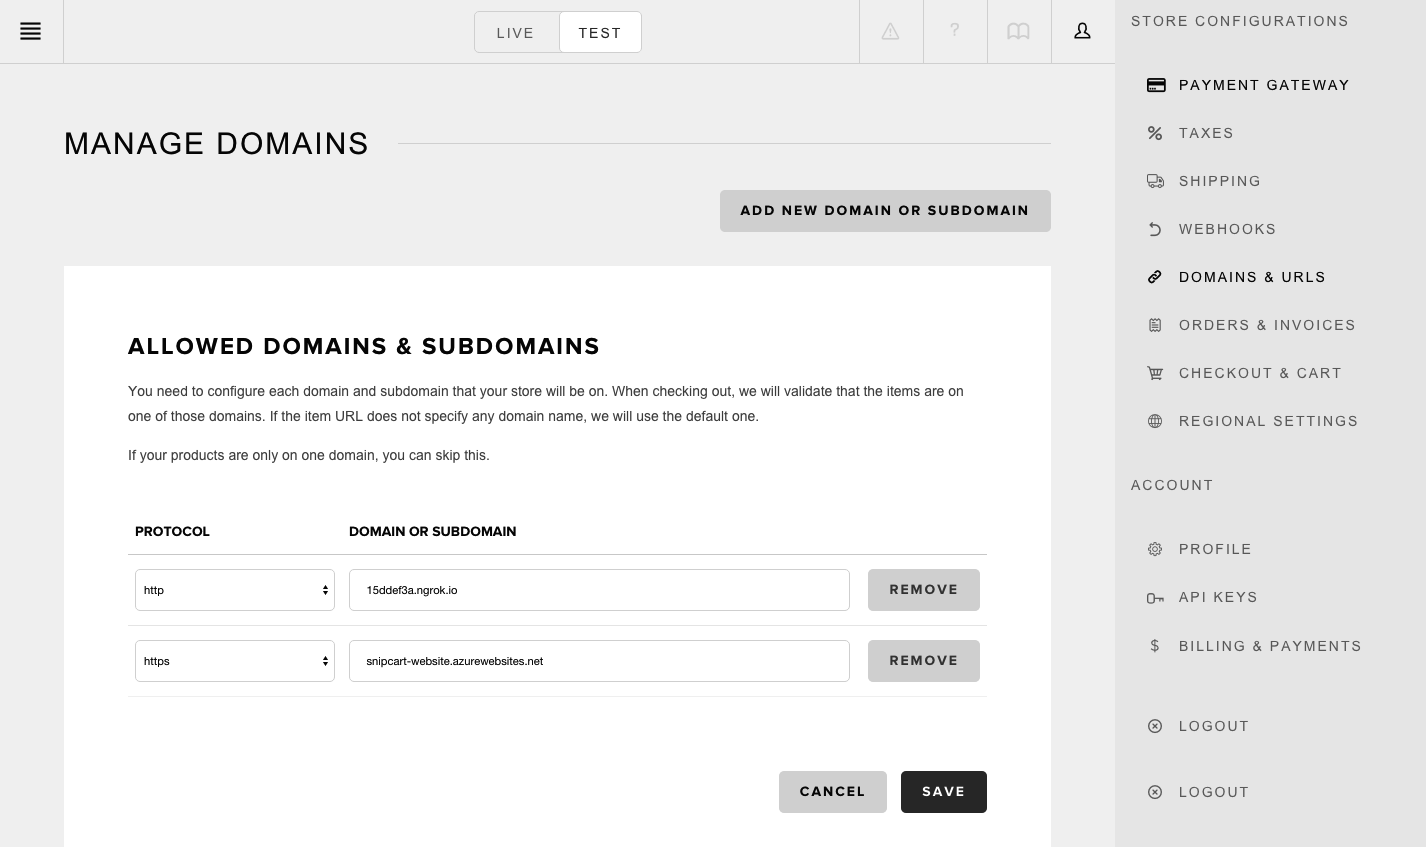
Hit the Add new domain or subdomain button to add a domain or subdomain, enter it in the new field, and save it.
When your customers are checking out, we validate that the products are on one of these domains. If the data-item-url does not specify any domain name, we will use the default one.
Redirect URL
Please note that this must be an absolute URL.
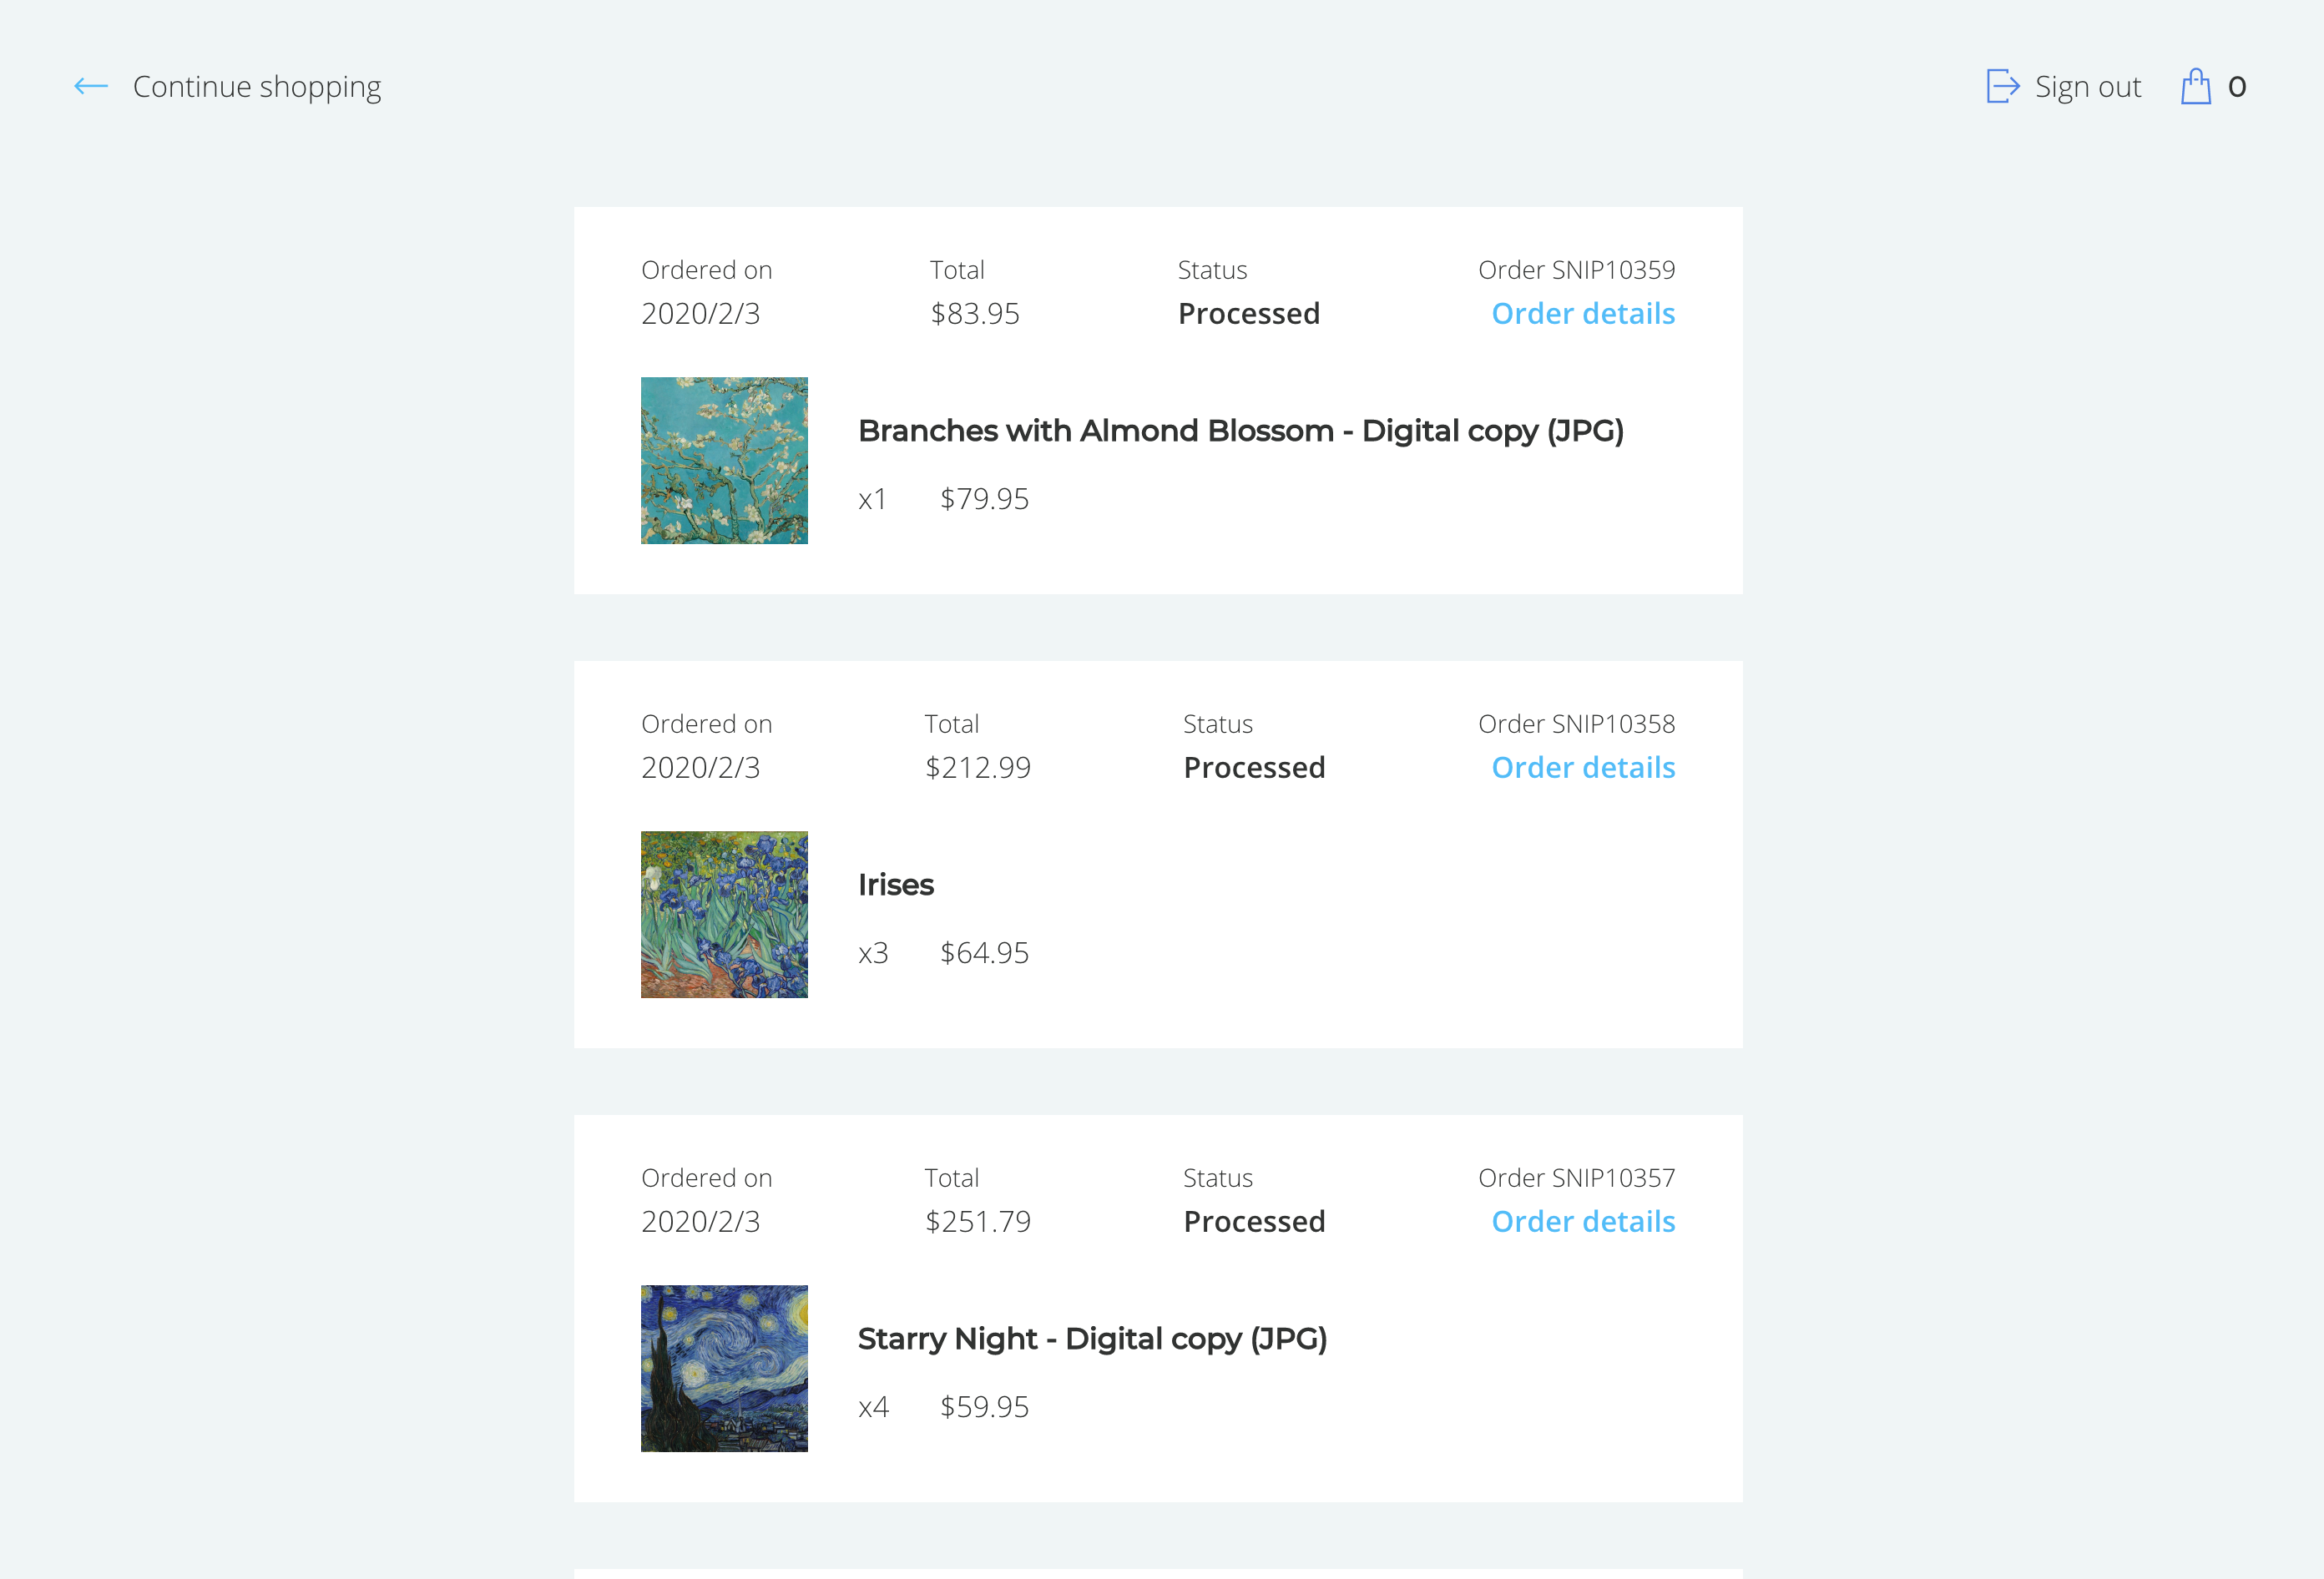
By setting a redirect URL, your customers will have access to a link in their email invoices pointing towards a list of their order history.
This URL can be anything on your domains/subdomains, as long as it has the snipcart.js file in the source. You could enter your store home page, for instance (https://yoursite[dot]com/shop). The customer will click on the email link, be redirected to your store home page, and see Snipcart pop-up and display a list of his orders.
Like this:
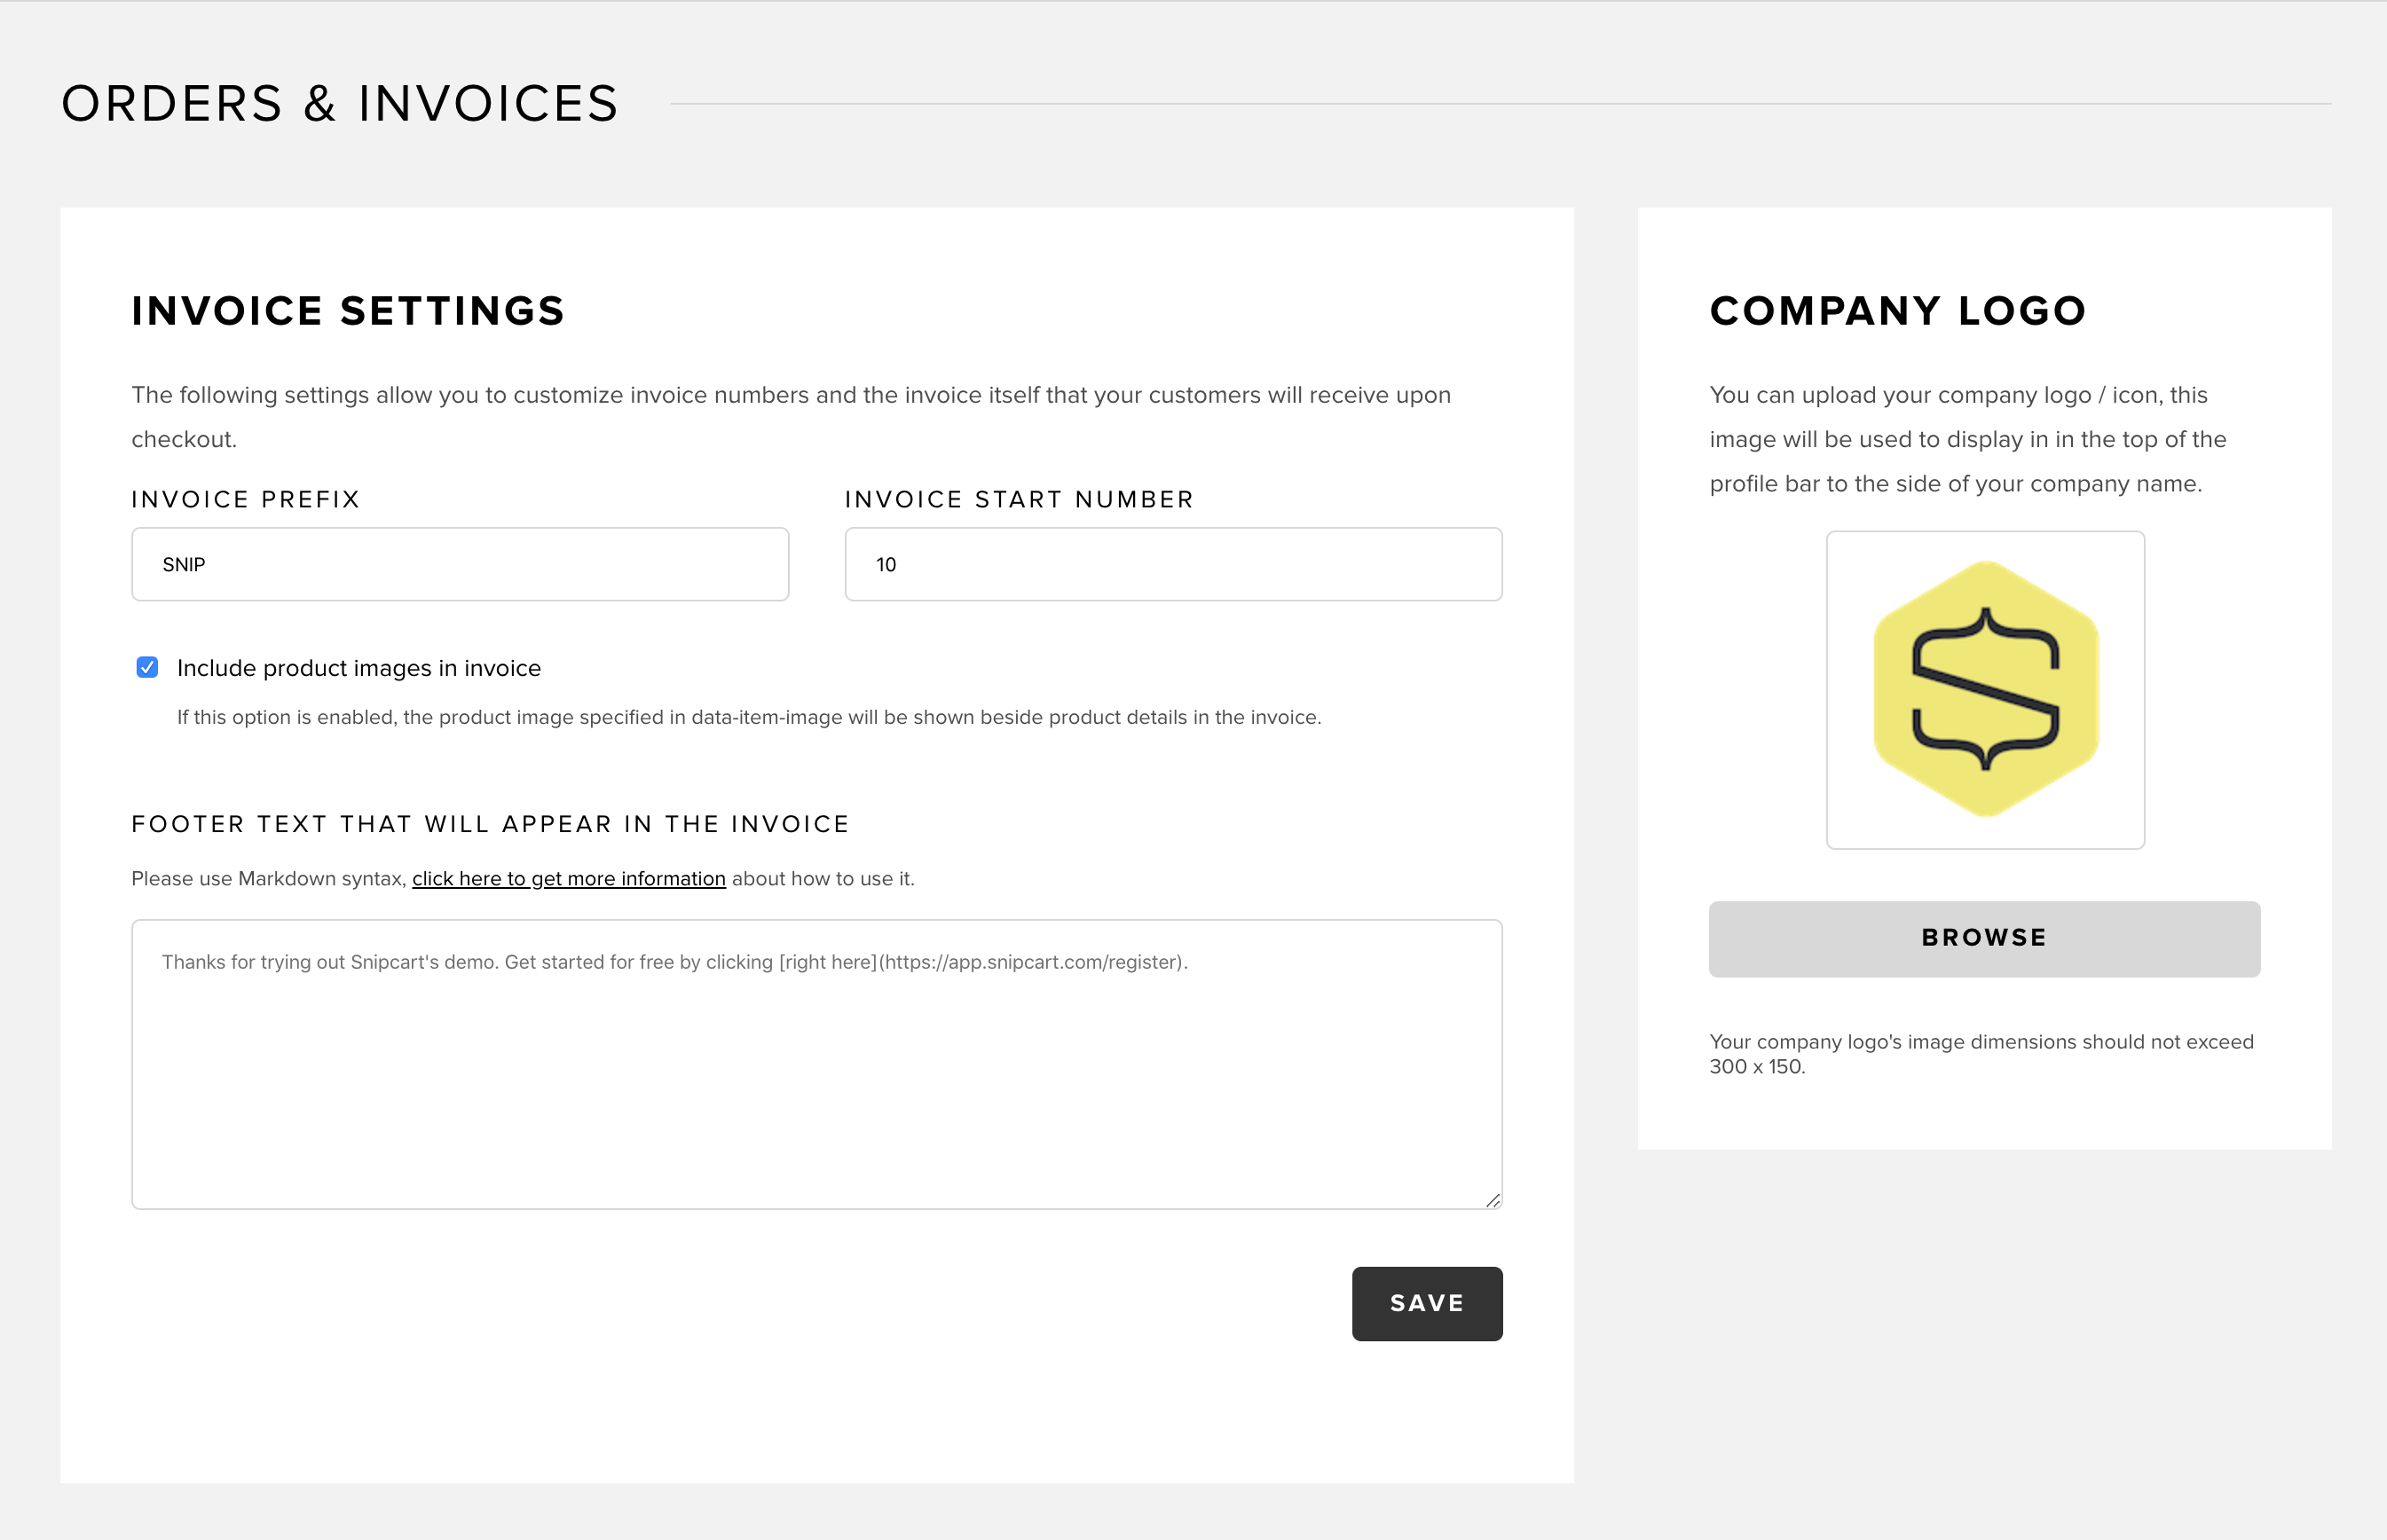
6. Orders invoices
This section allows you to customize the email invoices your customers receive after checking out through Snipcart.
You can add an invoice prefix, an invoice start number, a custom footer text and a company logo:
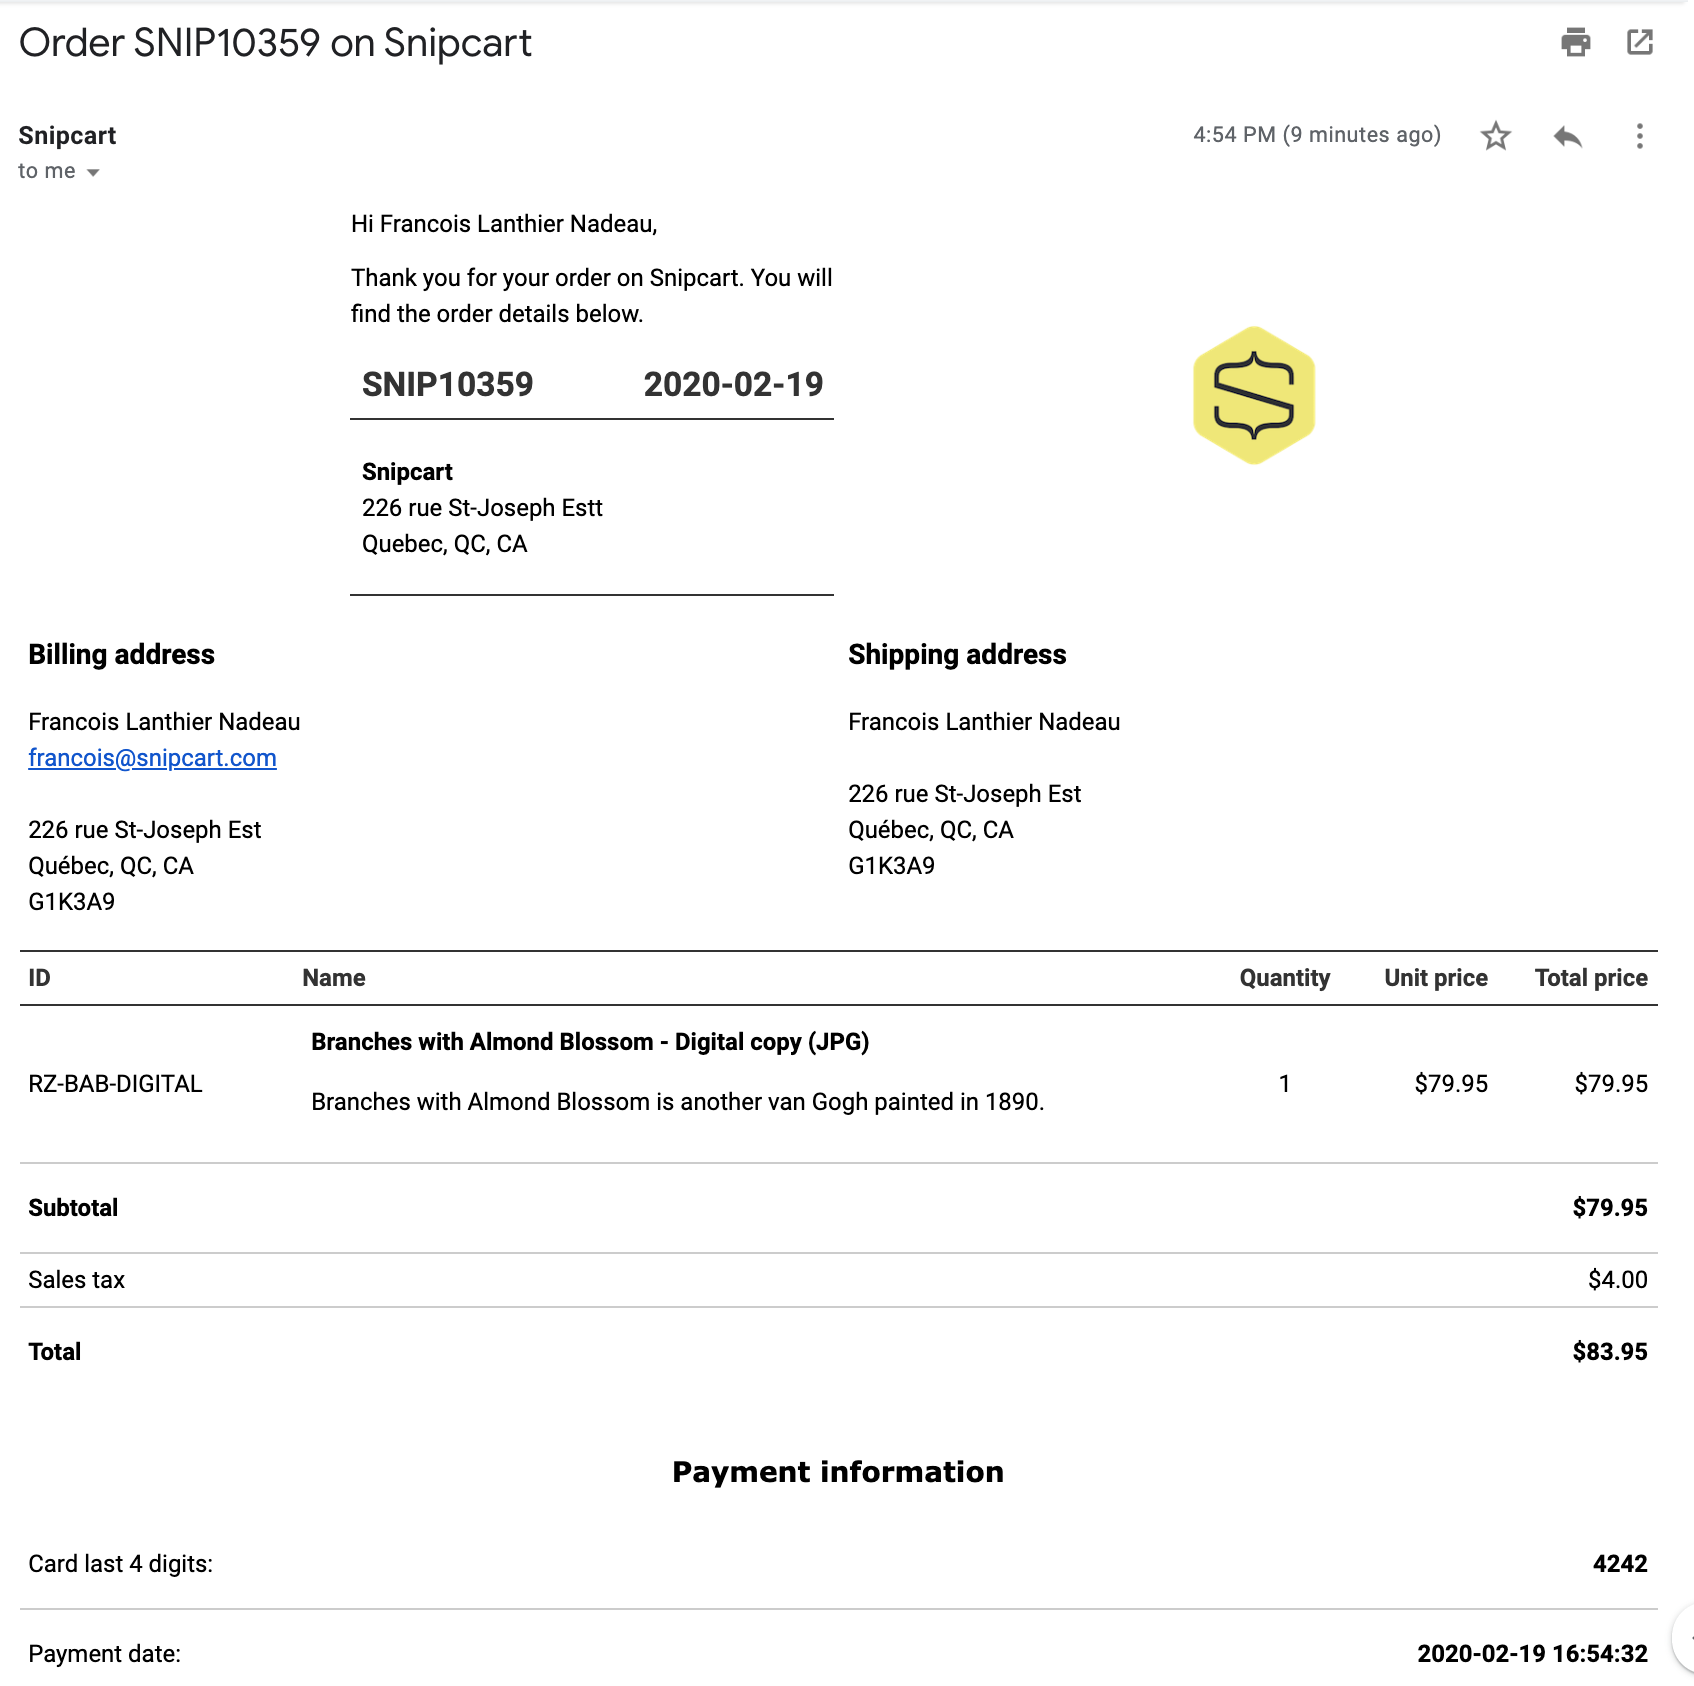
The details entered in the fields above would result in an invoice that looks like this:
7. Checkout cart
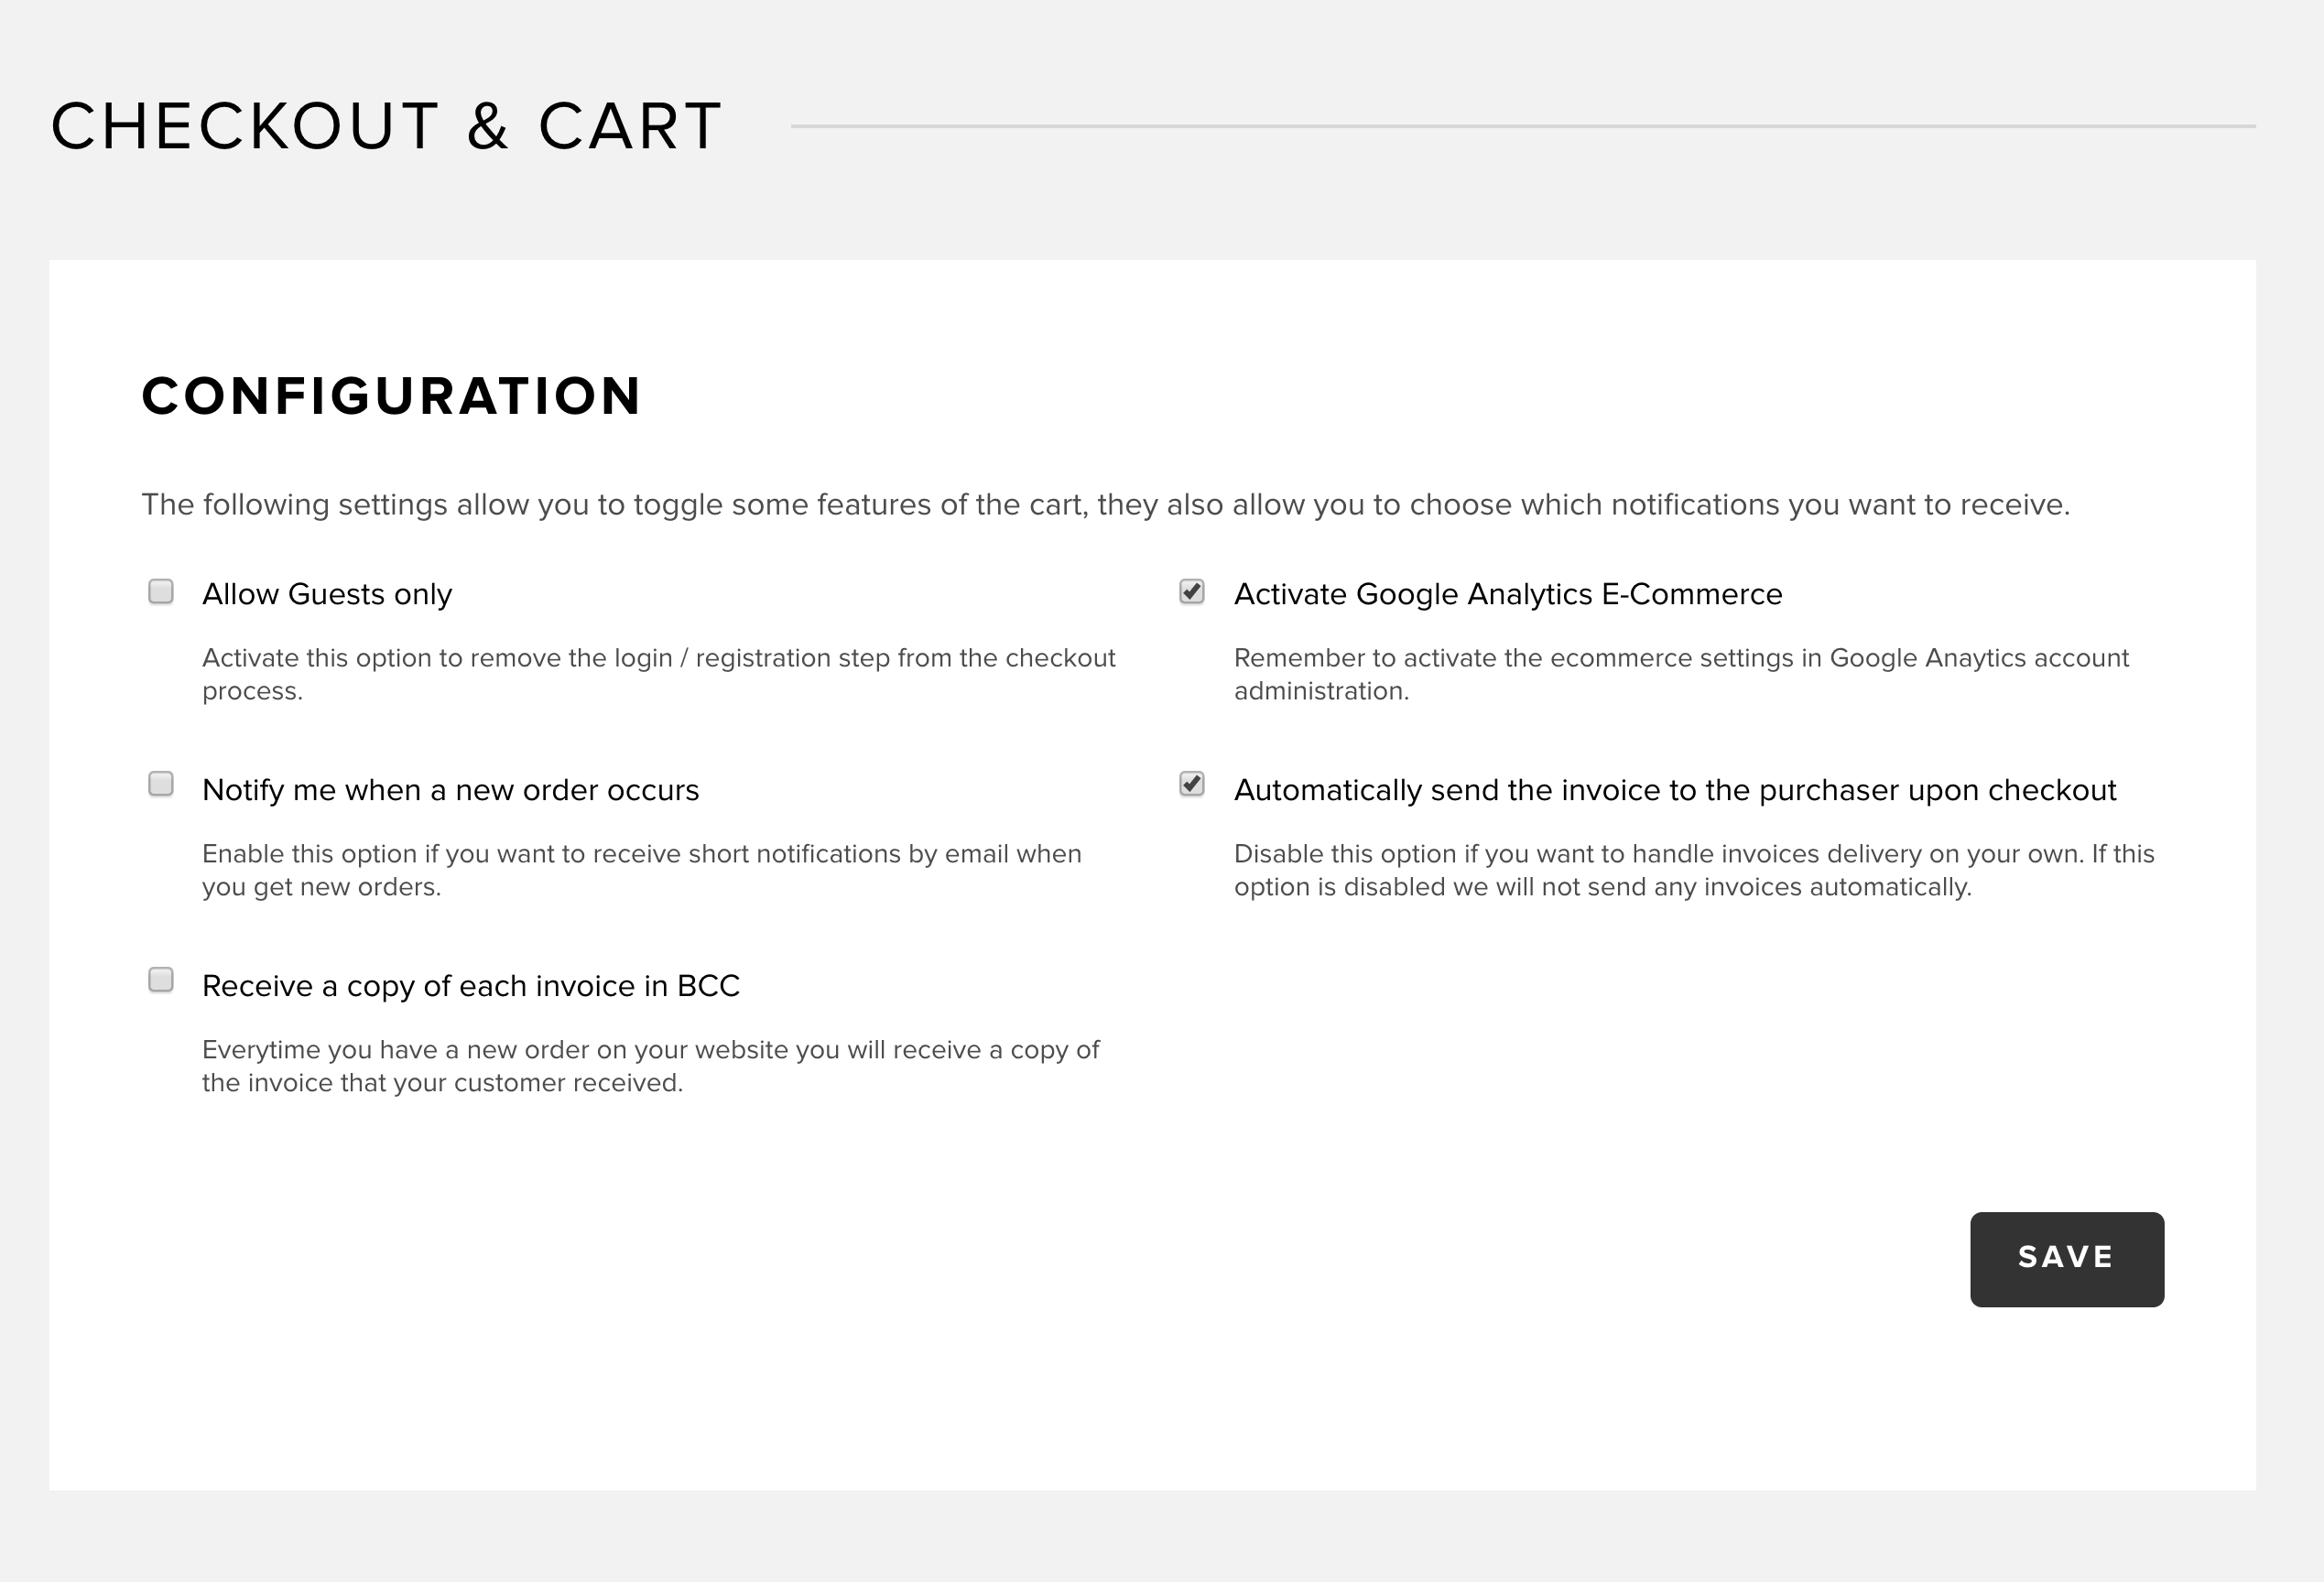
Allow Guests only
Marking this checkbox will remove the login and registration steps from your cart checkout. If you don't need customers to create an account on your Snipcart store, activate it. It'll speed up their checkout process.
Notify me when an order occurs
Marking this checkbox will trigger automatic short email notifications as soon as orders are completed on your Snipcart store. These notifications will be sent to the email address you used to create your Snipcart account. All other Snipcart users on the account will receive them.
Receive a copy of each invoice in BCC
Marking this checkbox will automatically send BCC hidden copies of each email invoice your customers receive after completing checkout on your store. These notifications will be sent to the email address you enter in the field below that option. That field will appear if you mark that box. You may add multiple emails separated by a comma , semicolon ; space or any mix of them Valid examples :
- geeks@snipcart.com
- geeks@snipcart.com,support@snipcart.com, info@snipcart.com
- geeks@snipcart.com ; support@snipcart.com,info@snipcart.com
- geeks@snipcart.com;support@snipcart.com,info@snipcart.com
Activate Google Analytics E-Commerce
Marking this checkbox will allow Snipcart to send data to Google Analytics E-Commerce Tracking. This integration will enable close tracking of e-commerce metrics such as time to purchase, product performance, sales performance by channels, product conversion rates and much more.
Automatically send the invoice to the purchaser upon checkout
Marking this checkbox will trigger the automatic sending of email invoices to customers after each completed order. If you'd rather send invoices on your own, without the help of Snipcart's automated invoice service, leave this box un-marked.
8. Regional settings
This section allows you to enable the countries and currencies you want your store to support.
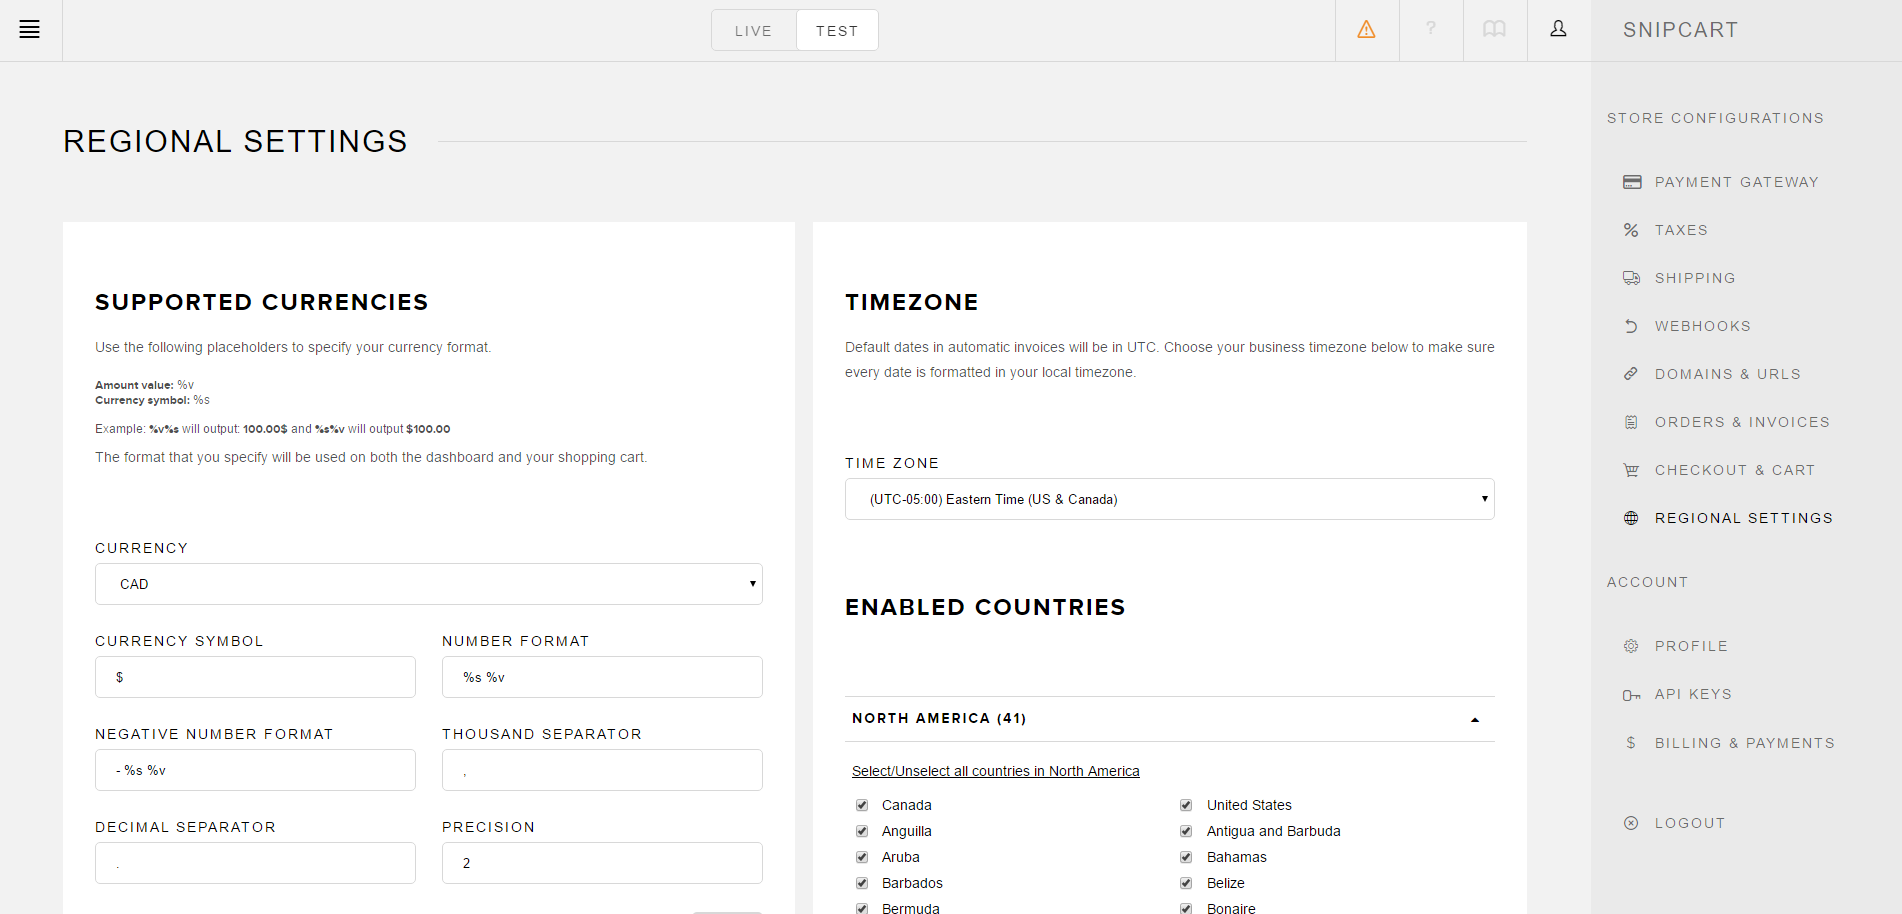
Supported currencies
In the screenshot above, CAD, USD & EUR have been set for the store.
After hitting the Add currency button, select the currency from the dropdown menu, set a symbol, and define the formatting it should have.
To learn more about setting up multiple currencies on your store, read this entry.
Timezone
Use this dropdown to select your business timezone. Dates will then be shown in the correct timezone in invoices and other emails. By default, UTC is be used.
Enabled countries
Available countries are divided by continents. To save some time here, use the quick Select/Unselect all countries link for each continent.
During checkout, billing addresses and shipping won't be available for customers coming from the countries you have not marked on this list.
Snipcart is available in mostly all countries over the world. However, depending on your chosen payment gateway, some countries might not be available.
9. Inventory management
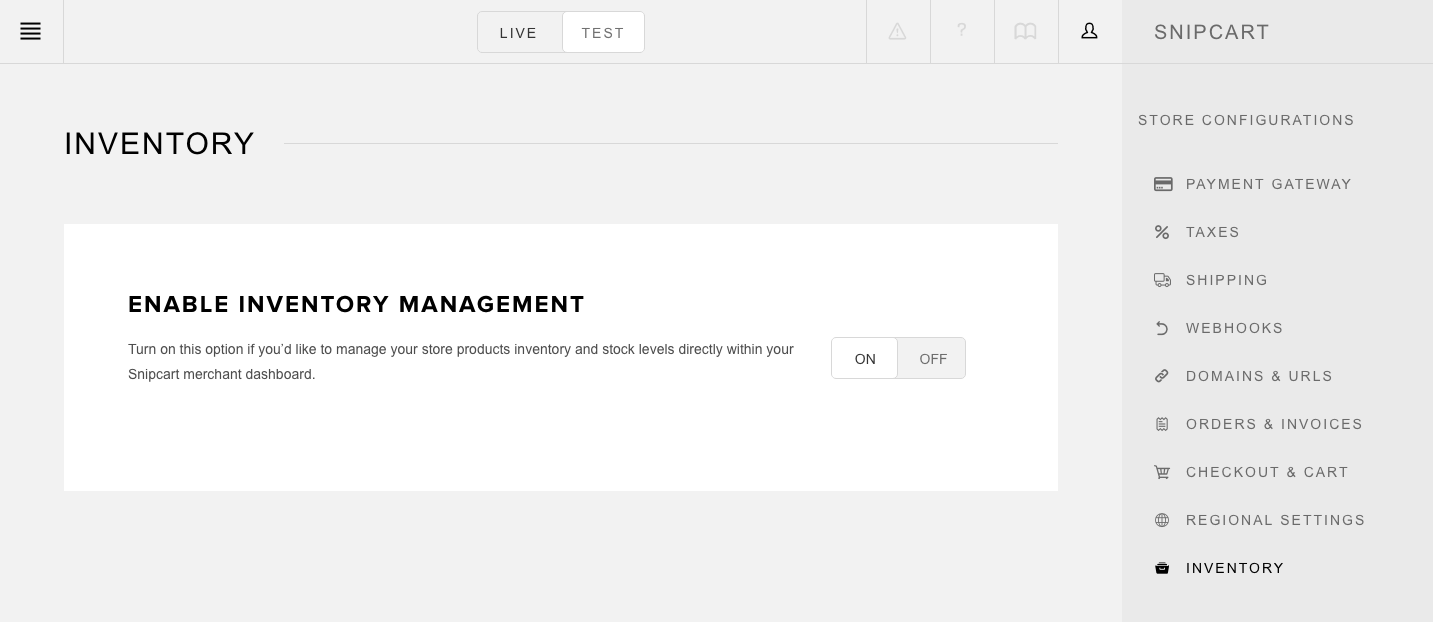
In this section, you can enable inventory management for your Snipcart store and products. Switching this toggle to ON allows you to assign stock levels to your products under the Products section of your merchant dashboard.
To get started with inventory management, read section 5.2 of this entry.
10. Email templates
To get started with email templates, read this entry.