Merchant configuration
To enable the custom payment gateway feature, head to Store configuration → Payment gateway and toggle the related switch.
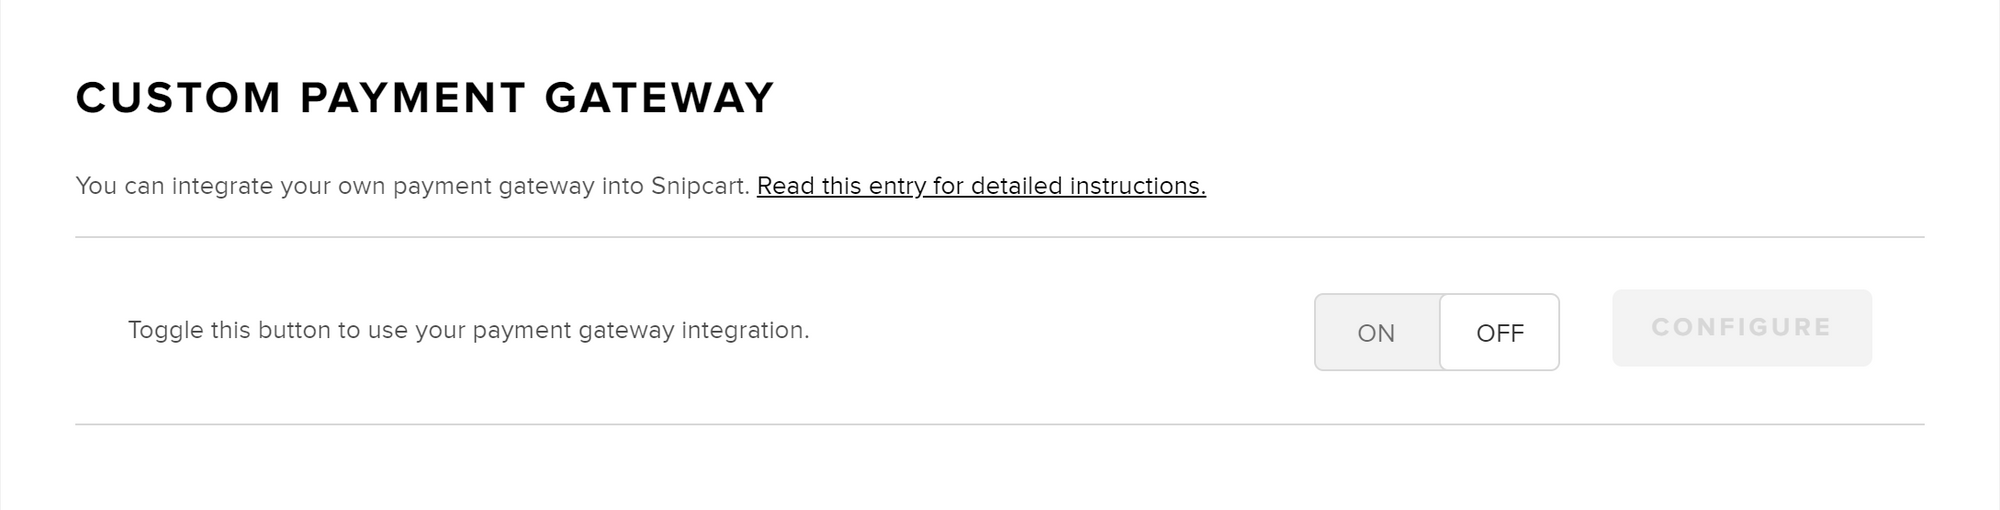
Once you've activated the feature, access the configuration screen by hitting the configure button.
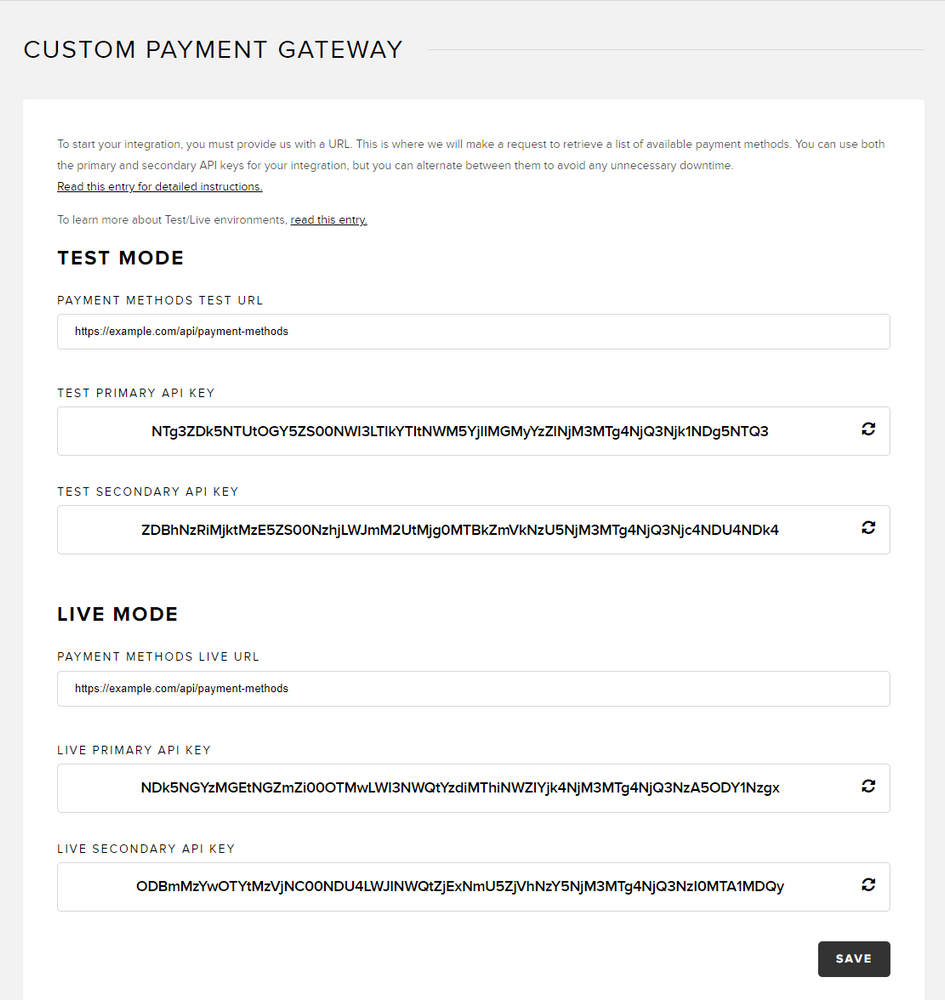
Like most of the Snipcart dashboard, the configuration screen is divided into two sections, Test and Live. If you are not familiar with the two environments, read this entry.
Payment methods URL
Inside the configuration screen, you need to enter the URL of your external checkout integration (payment methods URL). This is where we send an HTTP request to retrieve a list of available payment methods. A further documentation entry explains in detail the requirements for this endpoint.
API keys
These are the secret keys used for all server-to-server calls your external checkout makes to Snipcart. It is crucial to keep these keys private, as they would allow bad actors to process orders without paying.
Notice that there are two API keys generated for each mode, Test and Live. Should you wish to change your external checkout's API key, having two keys allows you to refresh one key while using the second key. Doing so prevents any unnecessary downtime. Keep in mind that regenerating an API key will immediately revoke all access to any application.
Note: if you wish to do so, you can set the same payment method URL for both
LiveandTestmode.